Live Streams
We offer different types of livestreaming: Windows Media, Microsoft Smooth Streaming, Wowza (Flash, Smooth, iPhone), Icecast, Webdav Push HTTP Live Streaming and Origin Pull HTTP Streaming. For more information about the different protocols please see: Appendix H: Stream protocols . In this appendix you also find specific setup information for all types of livestreaming we support.
In 99 percent of all cases Wowza (Flash, Smooth, Iphone) is the best choice. In this chapter we will focus on this type of livestream.
Add a livestream
In this chapter we will learn you how to create a LiveStream for the Wowza Media Server. Other types of streaming are setup in the same way, so you can use this guide for all types of streaming. Please see Appendix J: Recommended encoding settings for our recommended encoding settings. First you go to the Live Stream Tab. After that you click on the Add a livestream button. A wizard will appear, in this wizard you need to select Flash, Smooth, iPhone (Wowza). Then you click on next.

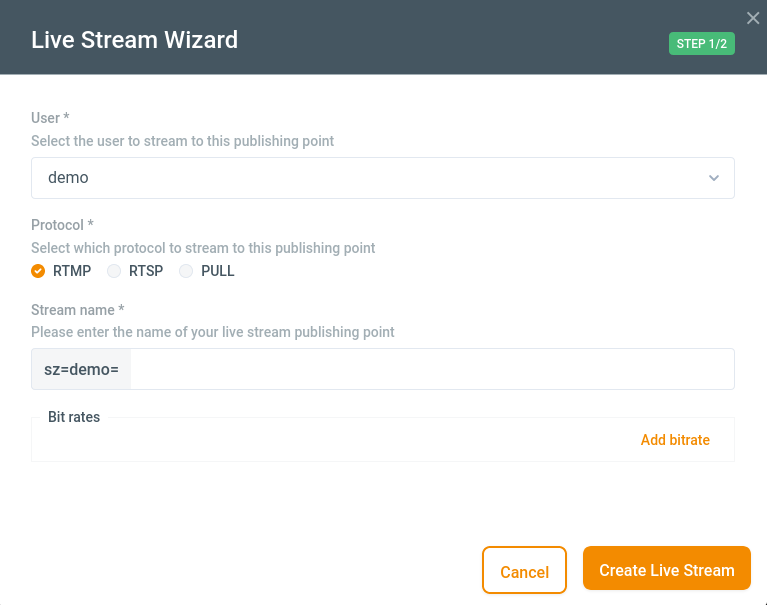
| Field | Discription |
|---|---|
| method | Select RTMP here. We offer 3 different stream Methods. RTMP, RTSP and Pull. RTMP: The default choice and should be used in most cases. RTSP: An older protocol, you only need to use this method if your encoder doesn't support RTMP. Pull: We download your rtmp or rtsp stream. You need to host your own stream. This can be used to pull your ip camera, without using an encoder. |
| Multi Bitrate | If you are planning to send multiple bitrates simultanesly you need to select yes. If you only provide a single bitrate you need to select no. |
| primary/ballback Wowza URL | You should always connect to both servers. This way your stream is redundant and highly available, even when one of the servers fail. |
| Stream | Here you can specify the name of your stream. Please don't use spaces or special characters. Dashes (-) are allowed. |
| Username | The username you need to specify in your encoder. |
| Password | The Password you need to specify in your encoder. |
When you have filled in all fields please click on Next.
Now a screen will open with all your provided settings. If everything is okay you can click on Next. The stream will now be created, this will take a minute.
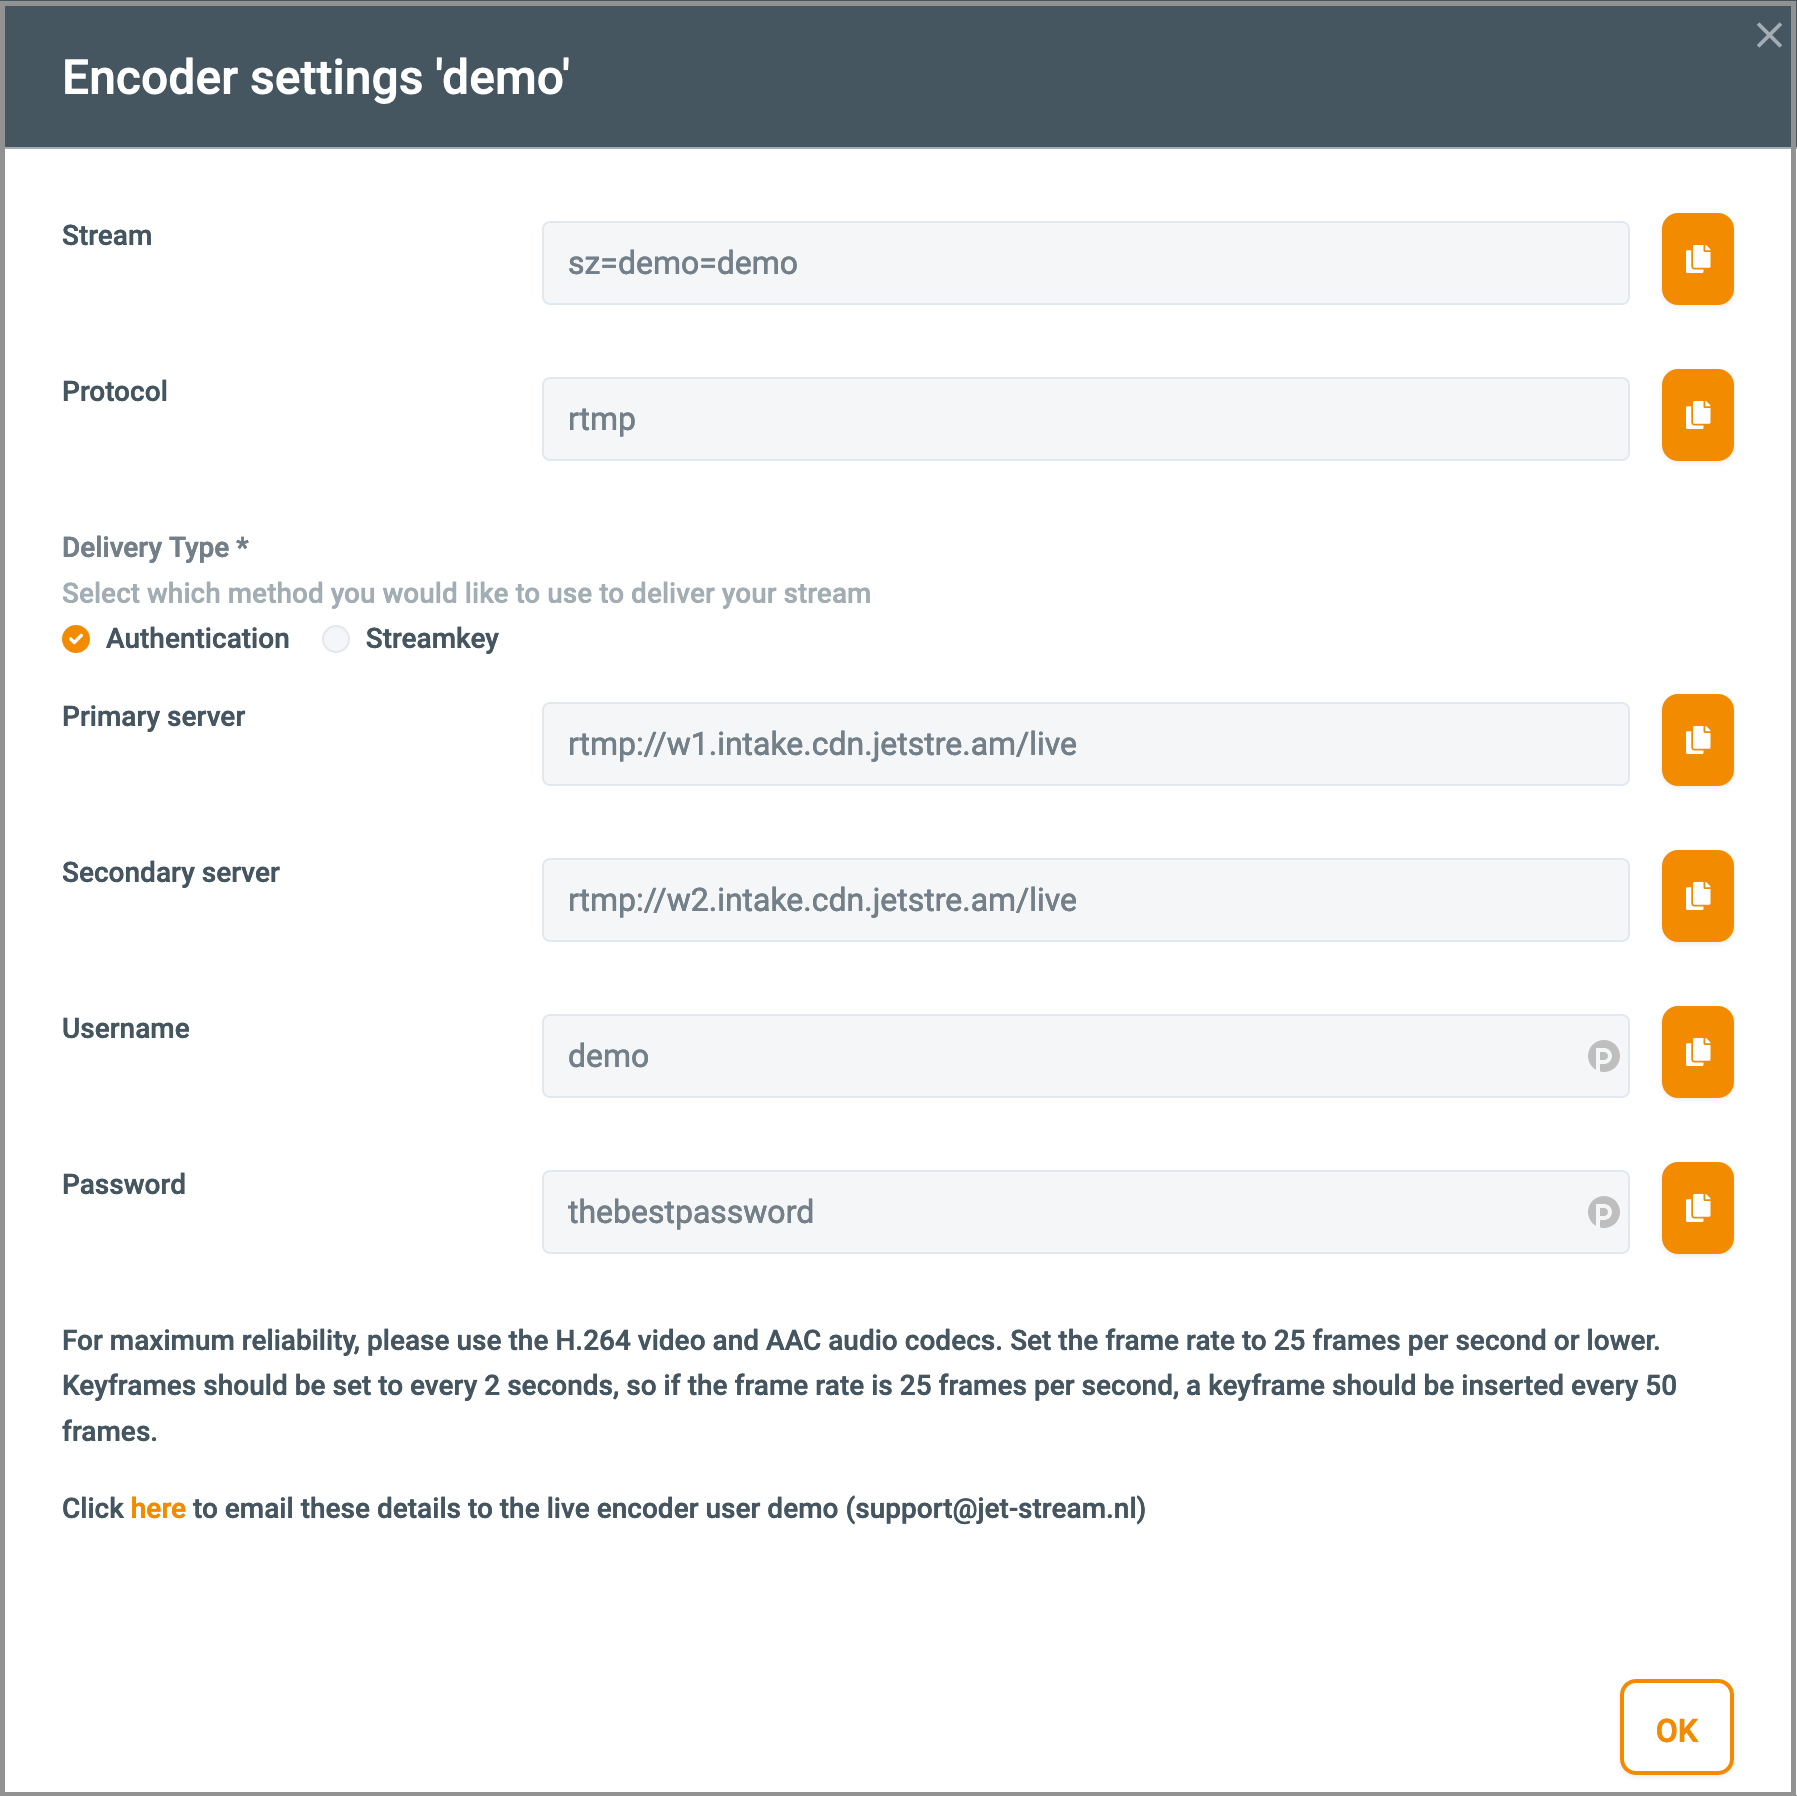
Now we are ready to setup your encoder.
Setting up your encoder
Please see How to setup your encoder
Managing your live streams
You can manage live streams by clicking on the live streams button in the control panel. Now you see all your live streams.
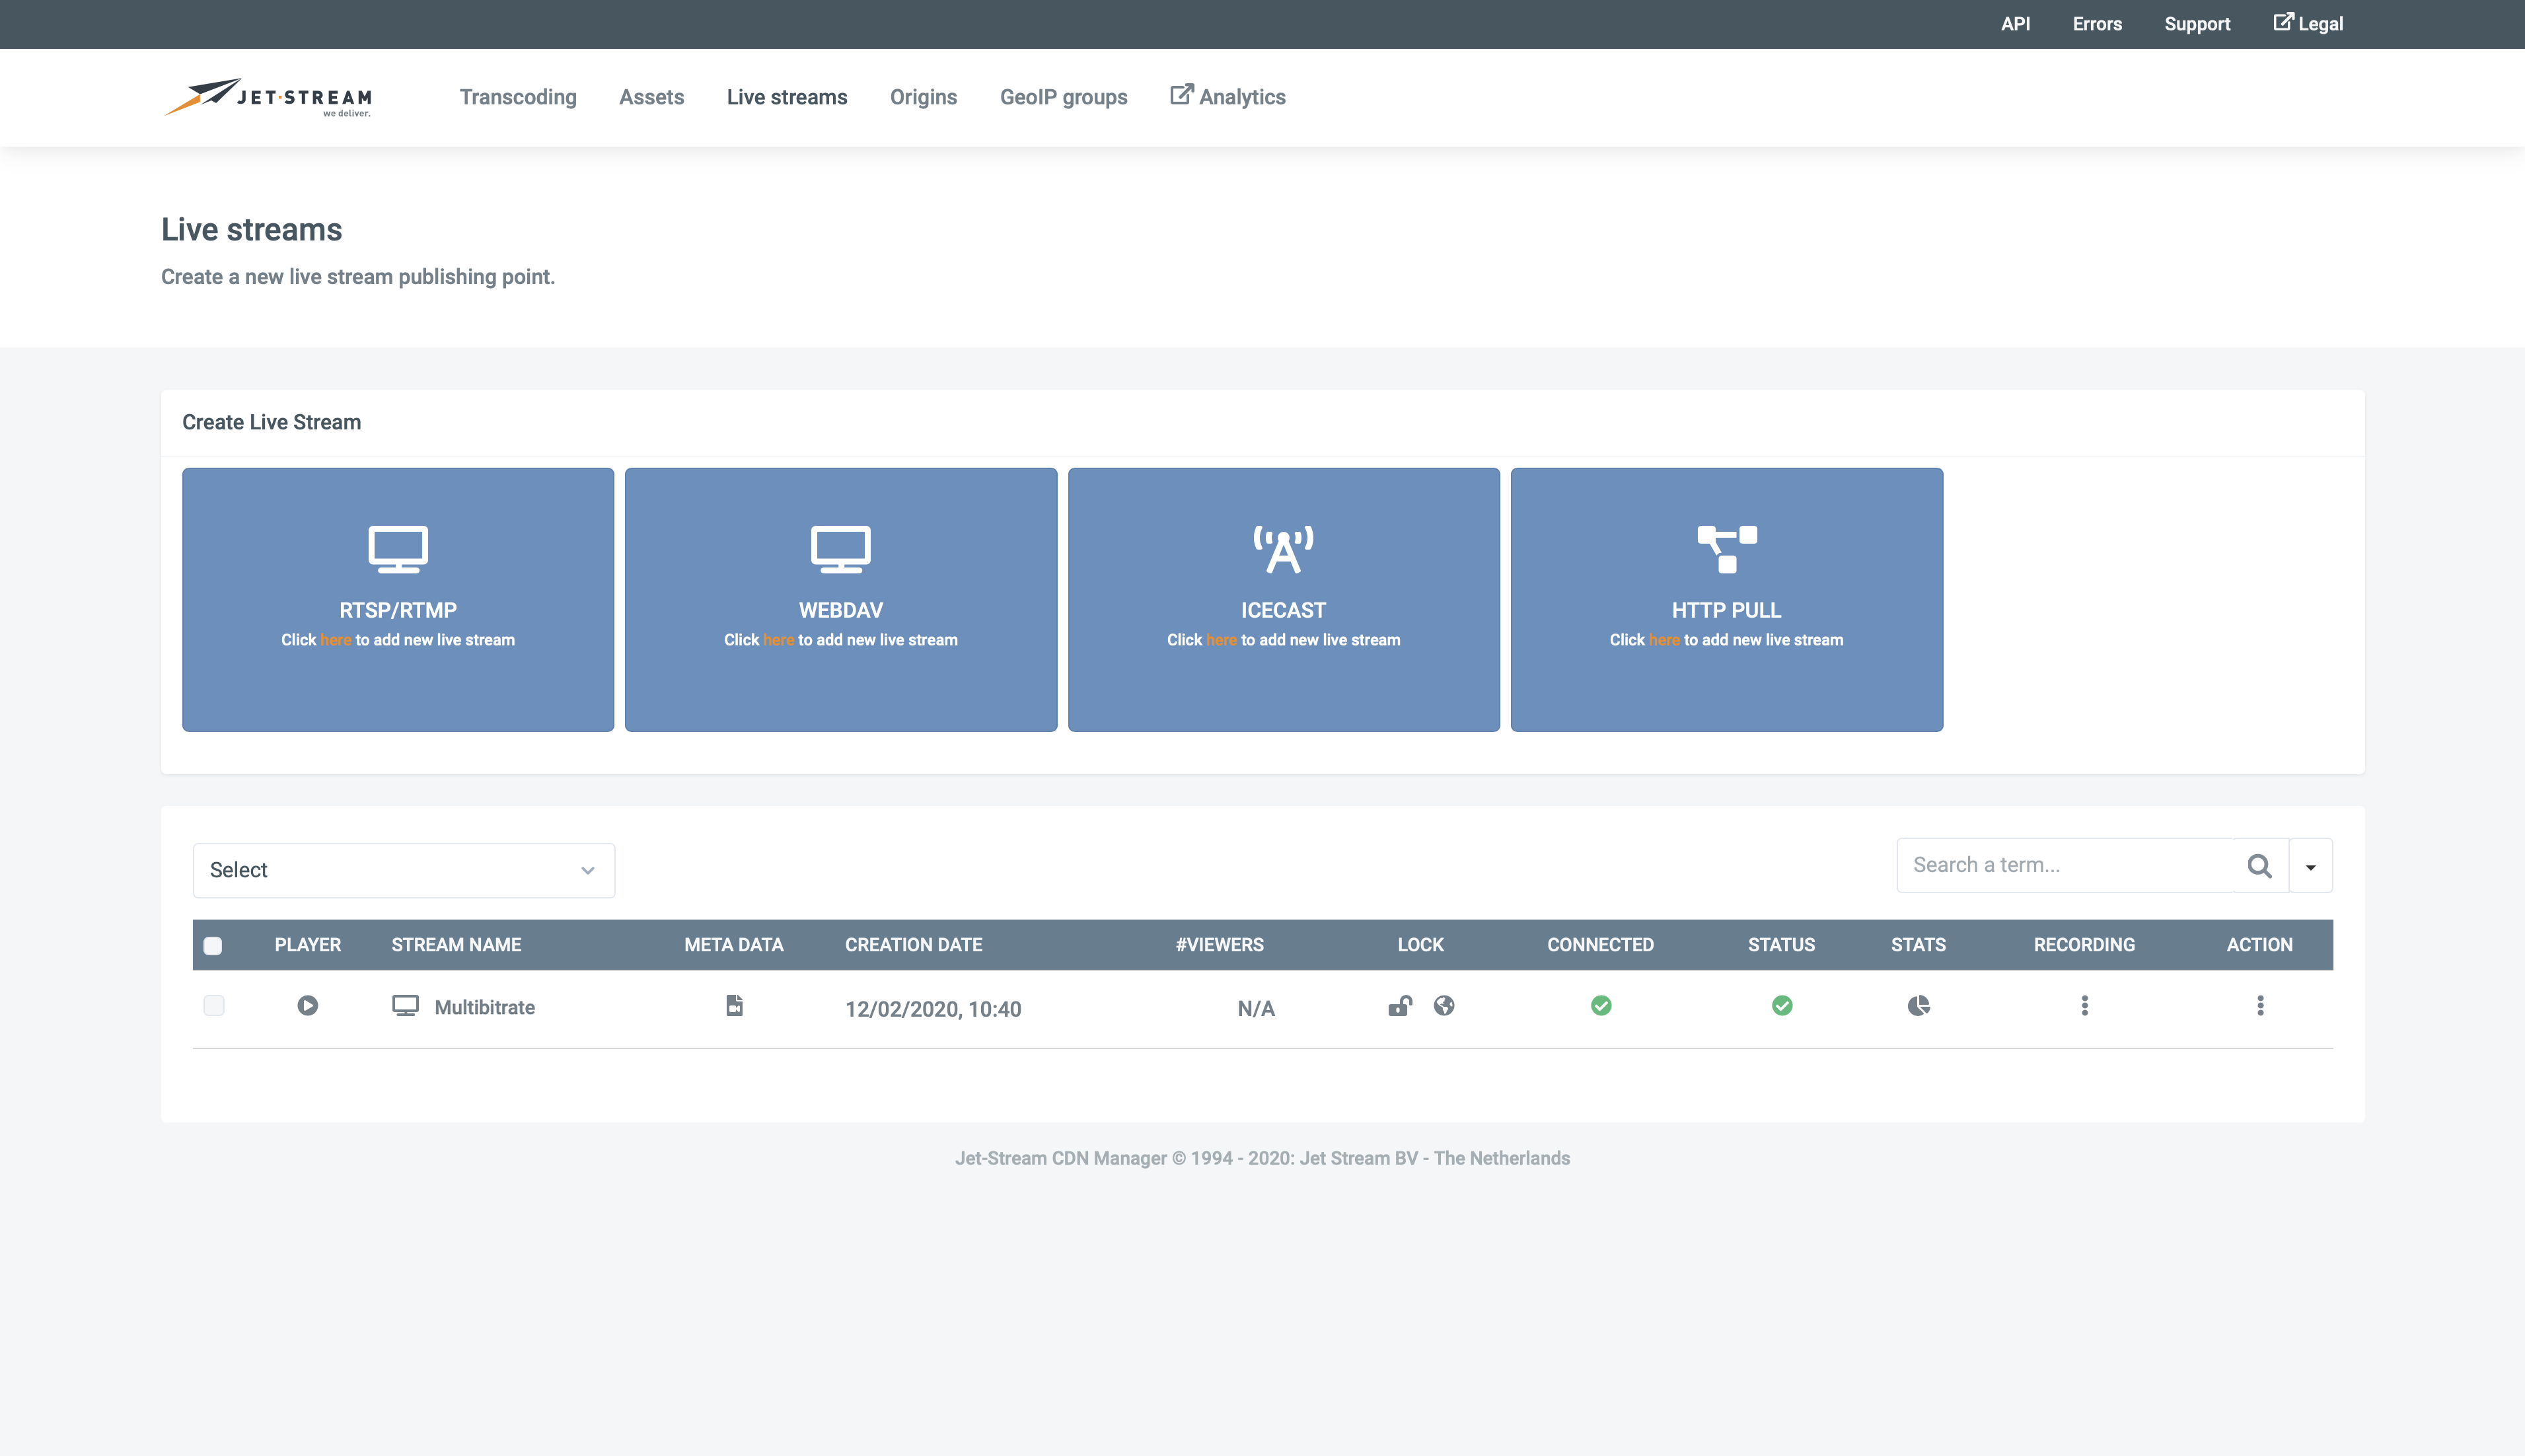
In the following table I will explain all columns on the live stream page:
| Name | Description |
|---|---|
| Select | A checkbox to select the asset so you can manipulate it by using an action in the dropdown menu which can be found on the bottom of the page. |
| Password lock | You can lock this stream requiring viewers to enter a password. See password protection. |
| Token lock | With this button you can lock a stream. A token is needed to view the asset. See generating tokens. |
| GeoIP Lock | With this button you can make the asset only available to a specific set of countries. When you click on the button a box wil open where you can select the allowed GeoIP groups. If you need to create custom GeoIP groups please see the GeoIP Group chapter in the manual. |
| Stream Name | The filename of the asset. If you click on it you can rename the file. This is only the display name, the filename will be the same. |
| Format | The streaming software used. In most cases this is Wowza Media Server |
| Type | The type is always live. |
| Bitrate | The bitrate of the livestream. The bitrate will be presented in kbps or mbps. |
| Resolution | You can find here the resolution of the livestream, this only applies to video content of course. |
| Upload | The time the livestream was created. |
| Current viewers | The amount of viewers of the live stream. |
| Statistics | When you click on the icon you see the requests/minute/network of the selected live stream. |
| Status | The status should always be a green checkmark. If you hover the icon. You can see if the encoder is connected correctly. |
| Broadcast | When you click on the Broadcast button a window will open with the settings needed to connect your encoder to the livestream. |
| Delete | With this button you delete (remove) the live stream. |
| Distribute | Distribute will mark the live stream as popular. All new viewers will be processed by the Bursting servers (normally you don't need this function, because the system decides by it's own what is popular). |
| Purge caches | Purge caches will remove any caches in the CDN. If you have trouble watching the livestream, this may fix the issue (normally you don't need this function). |
| Publish | With this button a box will open which creates embed code for you. This can be our iFrame player or a link to one of our supported protocols. See Appendix E: Embed code Generator for more information. |
You can also select multiple items by selecting the checkbox before the filename. After this you can select one of the following options in the -=actions=- dropdown menu:
| Action | Description |
|---|---|
| Embed code | With this option a box will open which creates embed code for you. This can be our iFrame player or a link to one of our supported protocols. See Appendix E: Embed code Generator for more information. |
| Delete | Delete the selected live stream. |
| Distribute | Distribute will mark the live stream as popular. All new viewers will be processed by the Bursting servers (normally you don't need this function, because the system decides by it's own what is popular). |
| Lock | Lock the selected live stream. A token is needed to view the live stream. Please see the API page for information about token generation. |
| Unlock | Unlock the selected live stream. A token is no longer needed to view the live stream. |
| GeoIP lock live streams | GeoIP lock the selected live streams. The live streams will only be available to a specific set of countries. When you select this action a box wil open where you can select the allowed GeoIP groups. If you need to create custom GeoIP groups please see the GeoIP Group chapter in the manual. |
| Purge all caches for selected files | Purge caches will remove any caches in the CDN. If you have trouble watching the livestream, this may fix the issue (normally you don't need this function). |
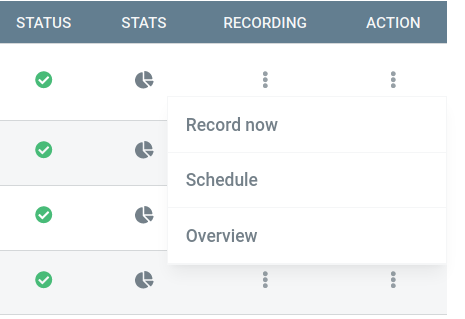
Record a livestream
You can record a live stream in multiple ways. The easiest is by manual start and stop the recording for a livestream. Here are the basic steps for starting a recording of a live stream. The recording controls are next ot the green status indicator in front of the live stream managing tools. The recording service is capable of recording multi bitrate live streams. When a live stream is multi bitrate, the recording server will detect this, and create a multi bitrate VoD when the recording is done including a needed smil file.
It is possible to update a scheduled or running recording. For a running recording, the stop time can be extended when needed. To update a scheduled or running recording look at the recording overview section
Record now
With the record now option you can start a recording instantly. You will need to fill in some extra information like
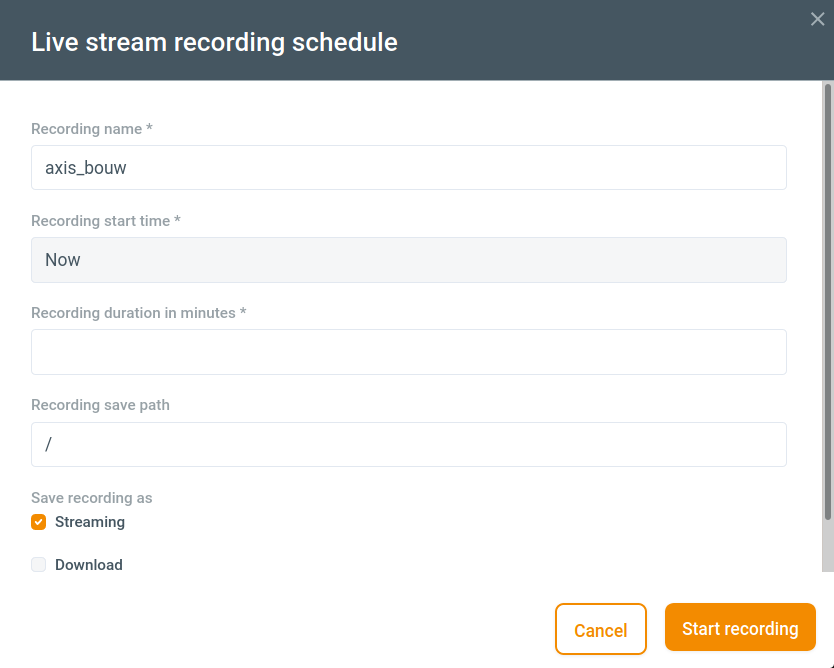
| Field | Description |
|---|---|
| Recording name | Enter the name of the VoD name for this recording. An initial name is giving based on the live stream name. Make sure the recording name is unique. Existing VoD will be overwritten when the recording name is re-used |
| Recording duration | Enter the duration in minutes for this recording. |
| Recording VoD location | Enter the storage path where the recording should be placed when done. This can either be '/' which is the default or any other location starting with '/'. Do not use spaces |
| Recording VoD type | Select whether the recording should be placed in the 'streaming' root, 'download' root or 'transcoding' root. |
With this option you can schedule a recording for X minutes starting NOW.
Stop now
With this option, you can stop the active recording for that live stream. When there is no recording running, the option is grayed out. When clicking the 'stop now' you will be asked to confirm first before the actual stop is sent.
When the action is done a confirmation message is shown.
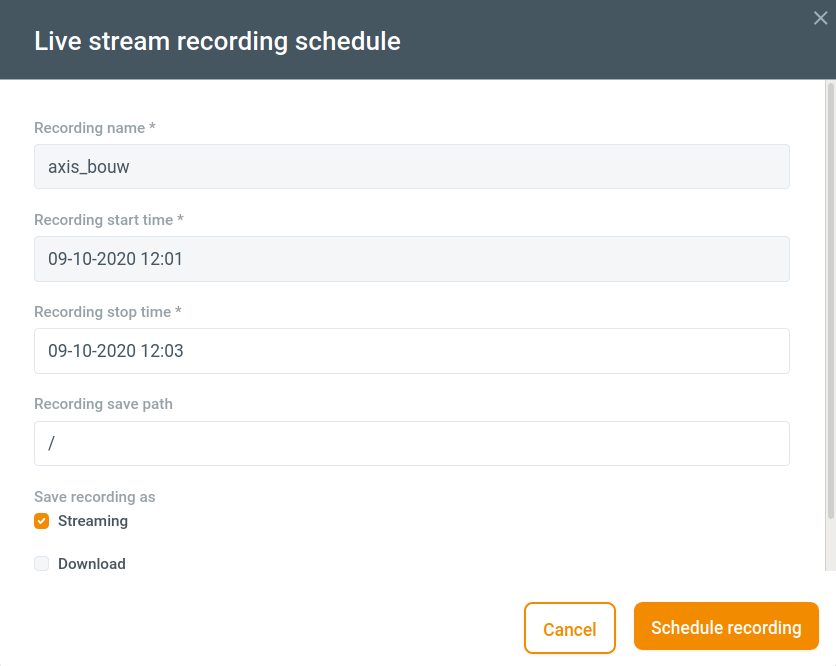
Schedule
With the schedule option you will almost see the same options as for record now. The difference is that you now specify a start and end time for the recording. This way you can schedule (multiple) recording(s) up front.
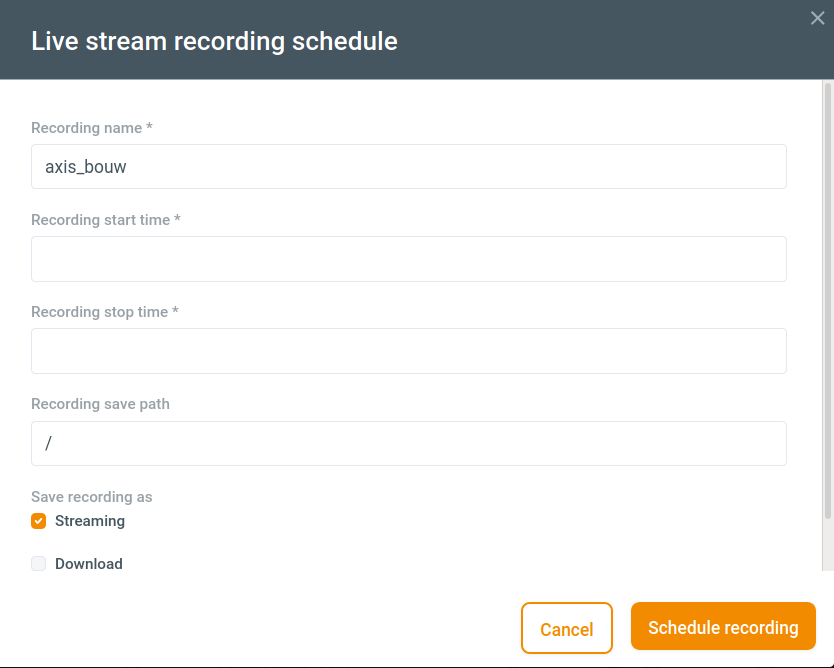
| Field | Description |
|---|---|
| Recording name | Enter the name of the VoD name for this recording. An initial name is giving based on the live stream name. Make sure the recording name is unique. Existing VoD will be overwritten when the recording name is re-used |
| Recording start time | Enter or select the recording start time |
| Recording stop time | Enter or select the recording stop time |
| Recording VoD location | Enter the storage path where the recording should be placed when done. This can either be '/' which is the default or any other location starting with '/'. Do not use spaces |
| Recording VoD type | Select whether the recording should be placed in the 'streaming' root, 'download' root or 'transcoding' root. |
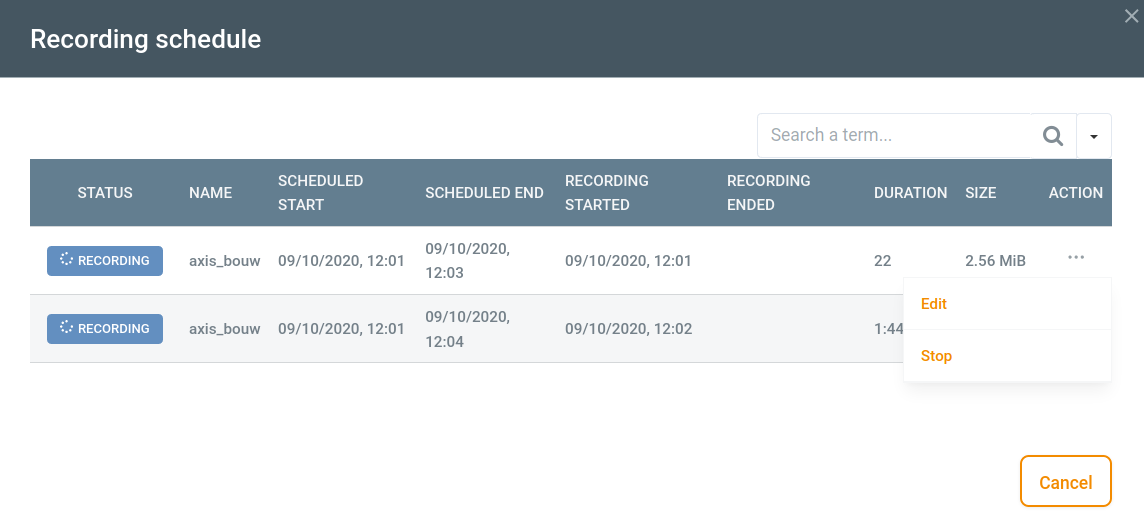
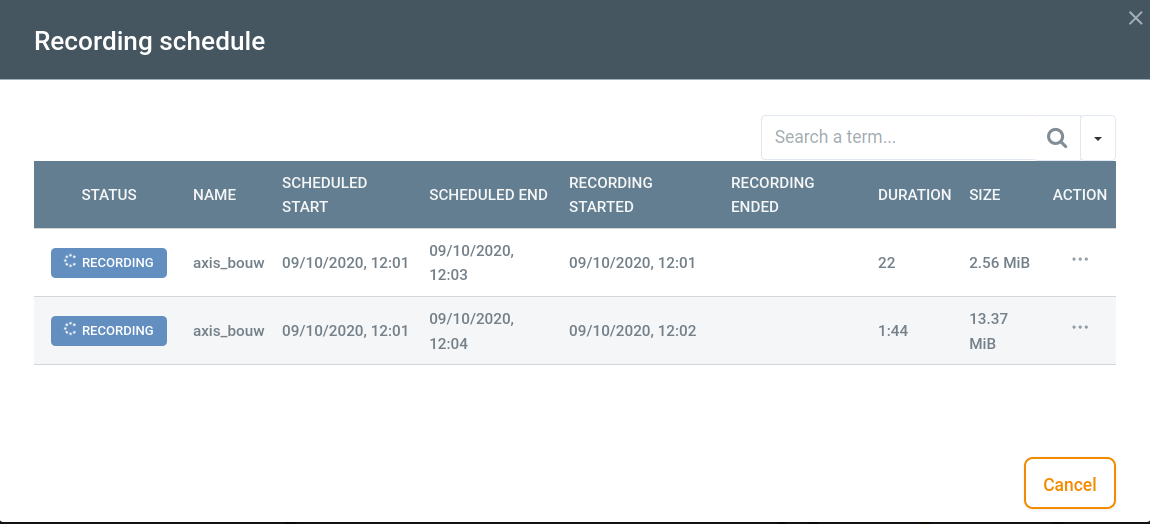
Overview
The overview option will give a list of all recording done for that specified live stream. Also you can edit here scheduled and running recordings.
Extending
It is also possible to extend a running recording. By clicking on the overview option of the livestream which is being recorded, you will get the above overview. In that overview you have an option to edit the recording. When clicking on this option, you will get the same window as for scheduling a recording. But the difference is that the name and start time are fixed / read only. So you are only able to change the end time. This can be extended, but also shortened. When the end time is set to a past time, the recording will stop instantly
Subtitles
It's possible to add subtitles to your live streams and VoD content.
Live streams
Wowza Media Server includes support for closed captioning for live streams. Your encoder need to send the closed caption in the CEA-608 format. When publishing the video, the captions will be automatically converted to a supported format for the chosen stream type. See https://www.wowza.com/forums/content.php?447-How-to-configure-closed-captioning-for-live-streaming for more information.
VoD / Assets
For VoD the following subtitle formats are supported: VTT(WebVTT).
The Subtitles are needed to be uploaded as progressive downloads. In order to let Cockpit match the subtitles with the asset, make sure the WebVTT has the filename in the following format: [ORIGINAL_ASSET_NAME]_[LANGUAGE].vtt where LANGUAGE is a 2 letter combination of the language name. When this WebVTT is uploaded, it is added to all assets that have the same base name. This means that the subtitle can be used on both streaming and downloads files. So subtitles can be re-used.
If you create a multi bitrate asset, use for ORIGINAL_ASSET_NAME the name of the smil file, and not an individual bitrate name.
Per language 1 WebVTT file is needed. In the embed code generator you can select all the languages you want to use. There is no limit to it.
More information: https://en.wikipedia.org/wiki/WebVTT