How to setup your encoder
Welcome to the quickstart guide of how to set up your Encoder.
Jet-Stream does not provide encoder support
Encoder settings
First we need to know which settings we need to enter into the encoder, Please go to the livestream page of the Cockpit system. here click on the actions button of the livestream you want to encode, now click on the encoder settings option.
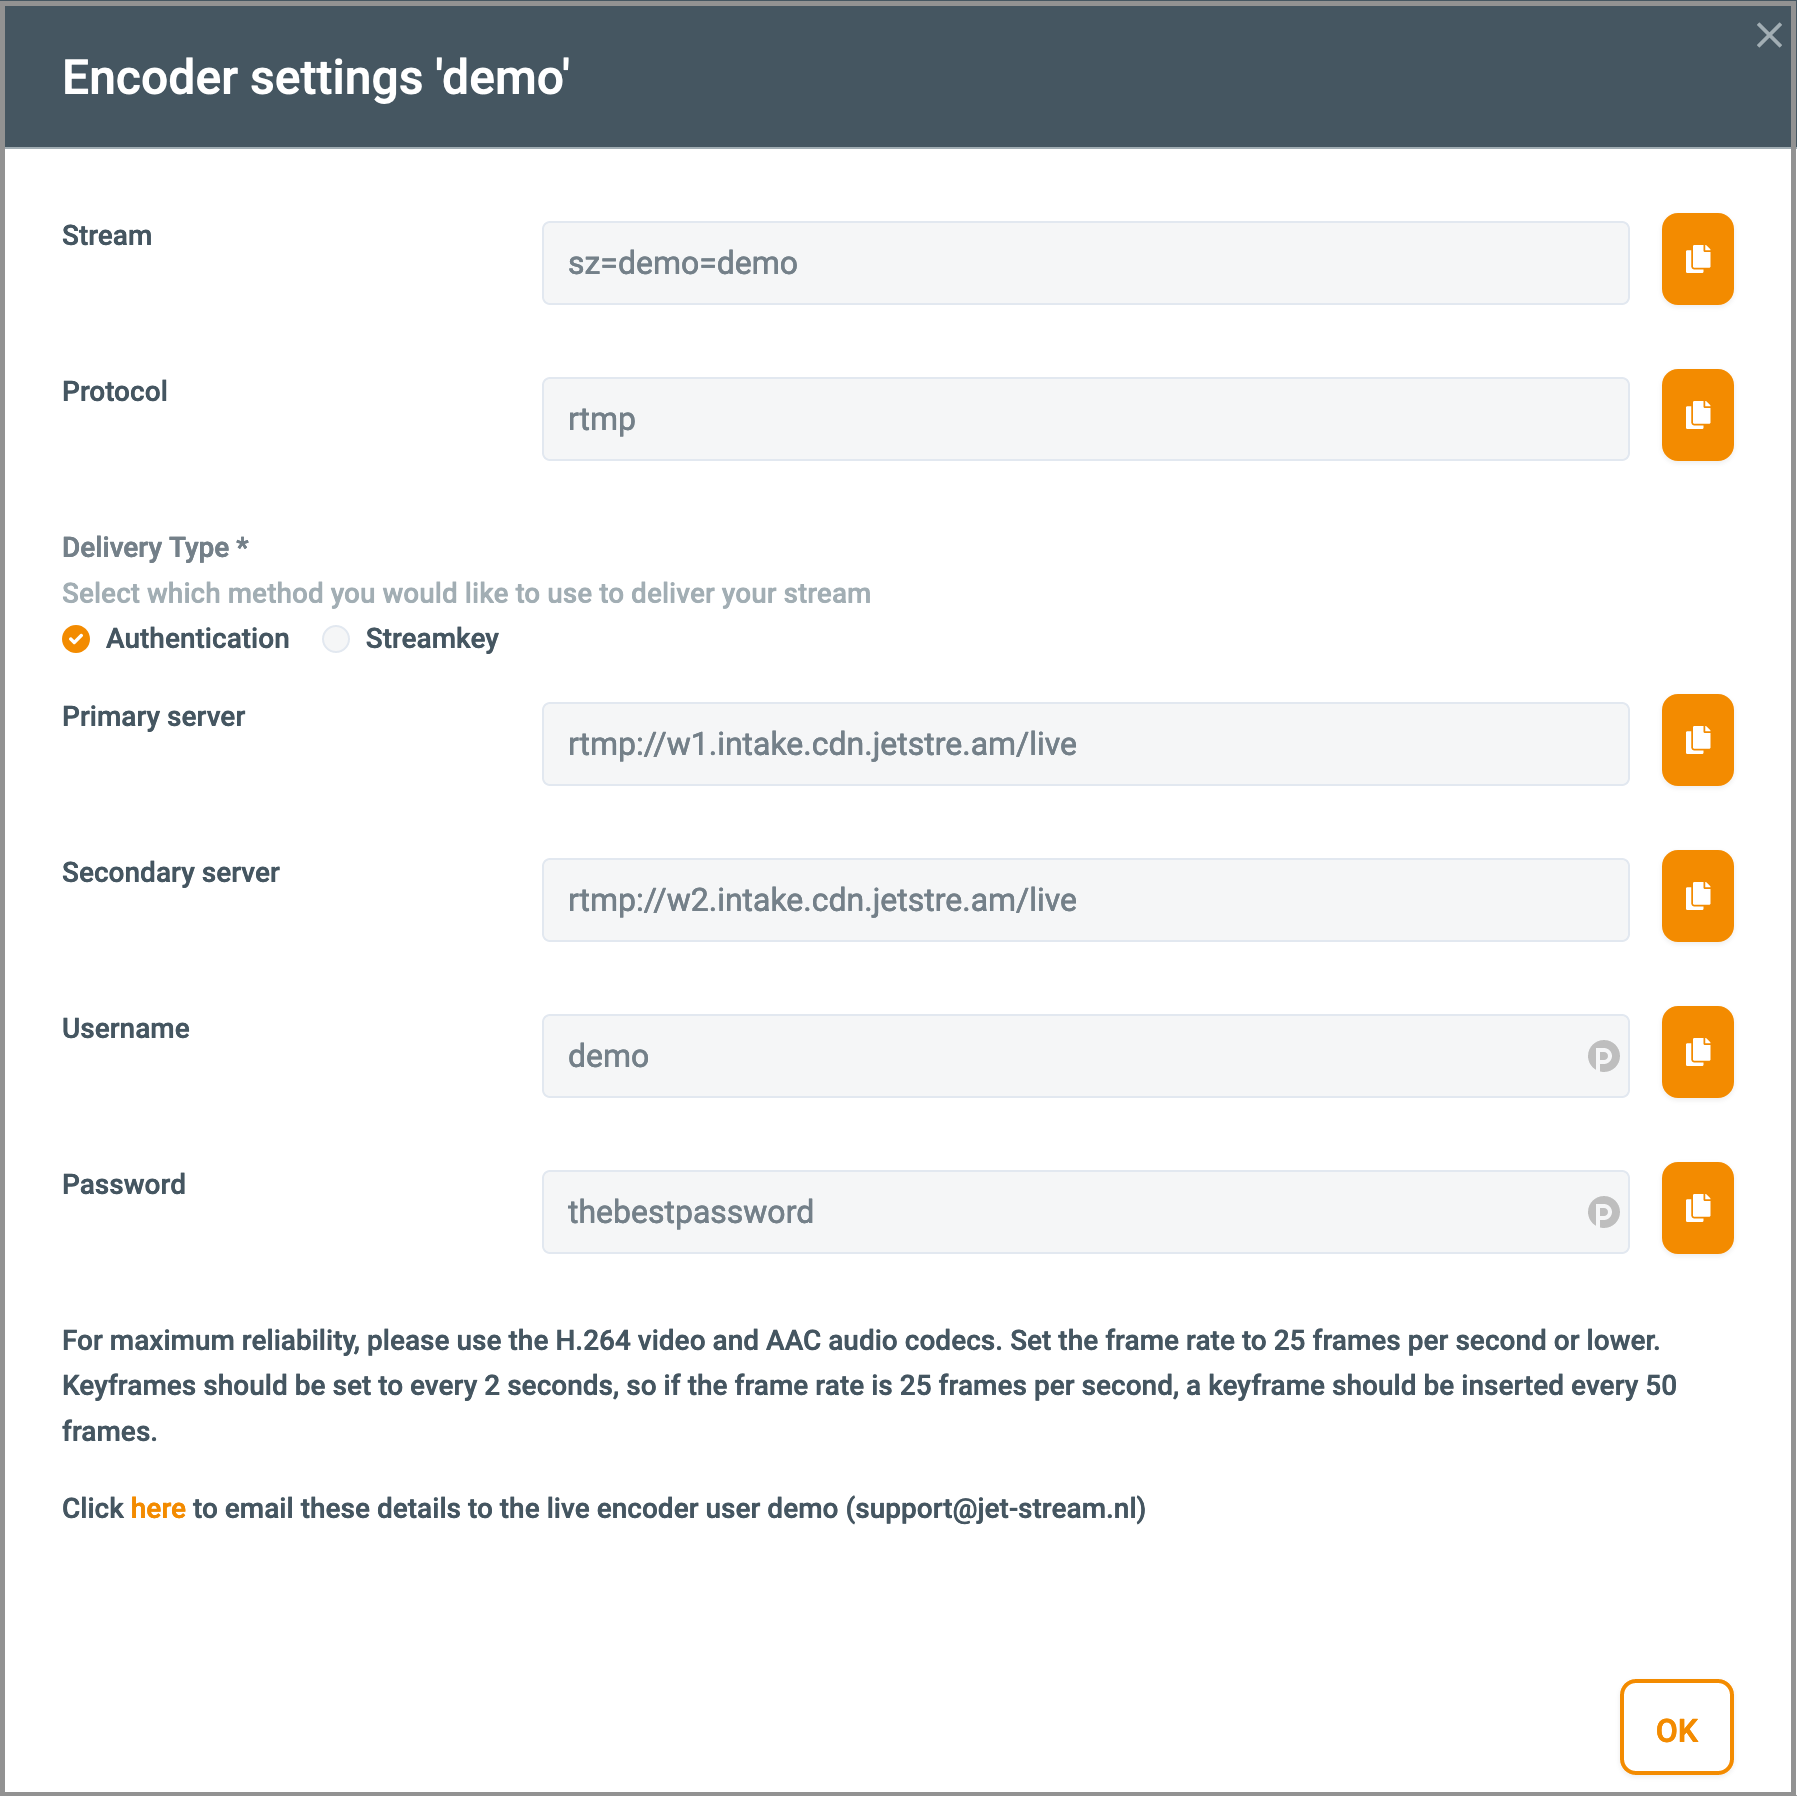
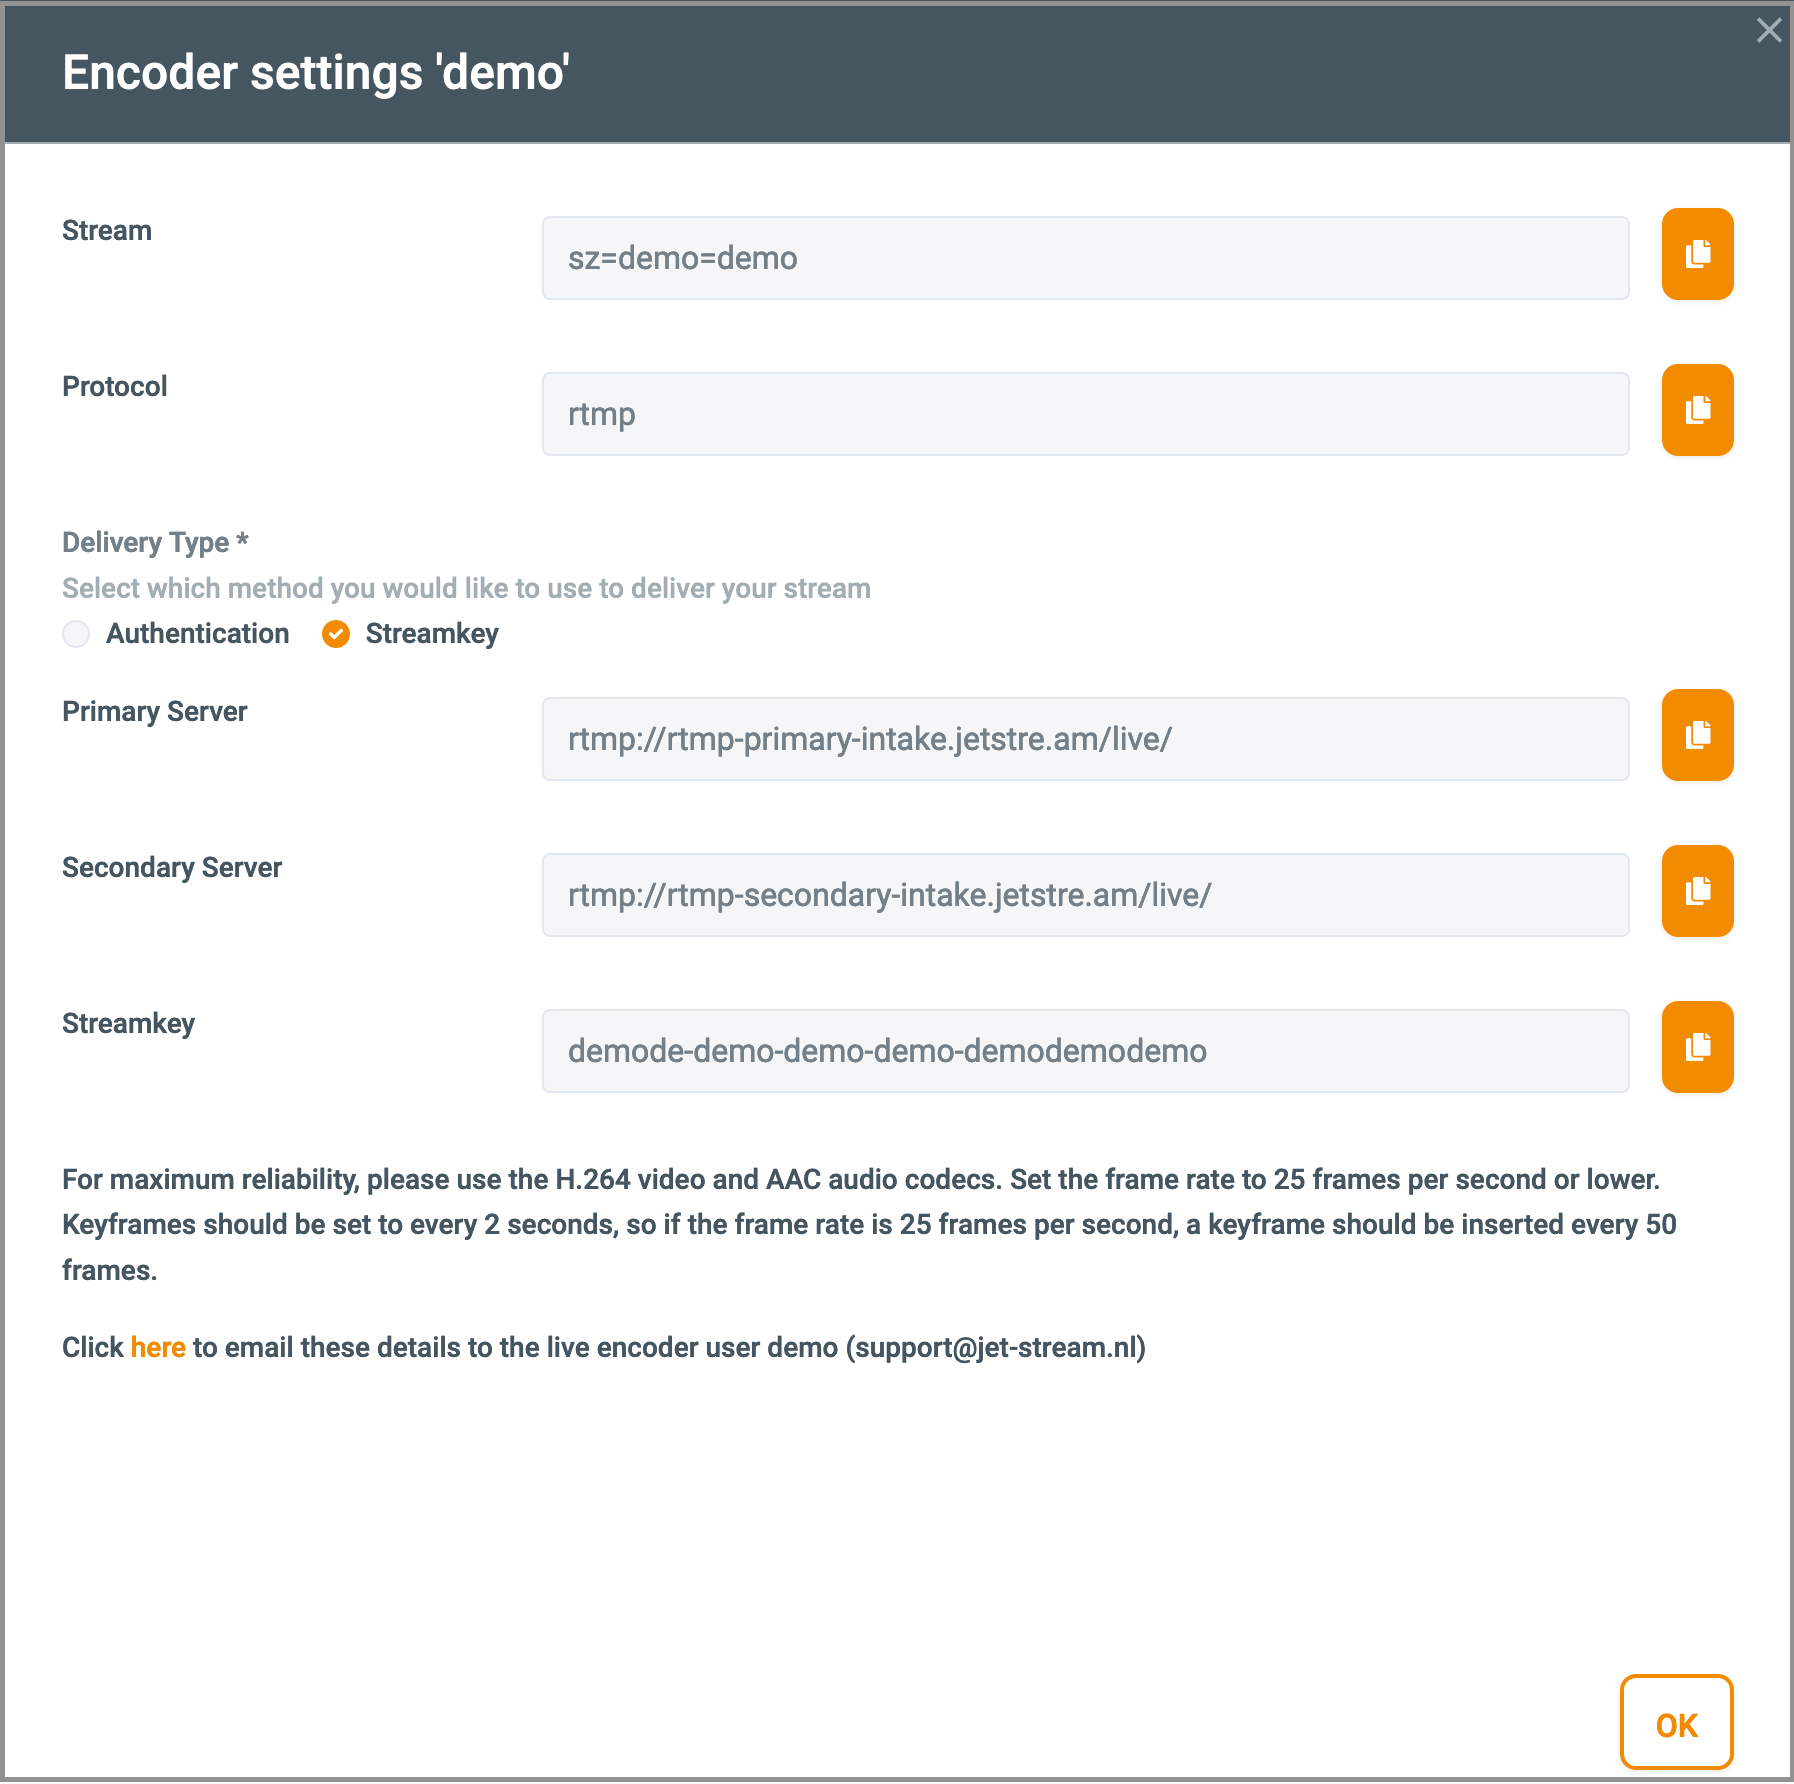
In the screen that now appears you are presented with two options: Authentication and Streamkey
Depending on your encoder you can choose what option you would like to use. Some encoders do not support Authentication based streaming so for those you would have to use the Streamkey option
- Authentication
- Streamkey
Now that we know the encoder settings we can go on to configuring your encoder.
OBS
OBS (Open Broadcaster Software) is a free encoder application for Windows, MacOS and Linux. OBS is commenly used to test and broadcast livestreams. for OBS you can also use the following settings: (Mind that the standard settings on first startup work fine to.)
| field | Desciption |
|---|---|
| Container | MP4 (Only if applicable) |
| Videocodec | H264 |
| Keyframes | 2 seconds. When you are using 25 FPS you need to configure a keyframe every 50 frames |
| H264 profile | When the resolution is below 1280*720: Baseline 3.2 When the resolution is 1280*720 or higher: High 4.1 |
| Video bitrates | 424*240 512 kbit (Baseline 3.2) 640*360 1 mbit (Baseline 3.2) 1280*720 2,5 mbit (High 4.1) 1920*1080 5 mbit (High 4.1) |
| Audio codec | AAC-LC or AAC when AAC is not an option for you, you should use MP3 Samplerate: 48Khz |
OBS Studio software
OBS is a free, open source encoder for Windows, MacOS and Linux. Download the software here:https://obsproject.com and install it on your computer.
Computer specs
We advise to use a modern, powerful PC or laptop for live encoding. Encoding is CPU intensive. Base specs are 8GB memory and 4 core CPU. Any recent MacBook or similar Windows laptop should be suffi-cient.
Connection
We advise to avoid wifi or mobile connections and use a dedicated ethernet link to a dedicated professio-nal internet connection with sufficient upstream capacity of at least 10Mbps for HD streaming.
Setup OBS
Copy the provided encoder settings
Use the orange copy icons to copy the server name, the stream name, the user name and the password.
Paste the provided encoder settings
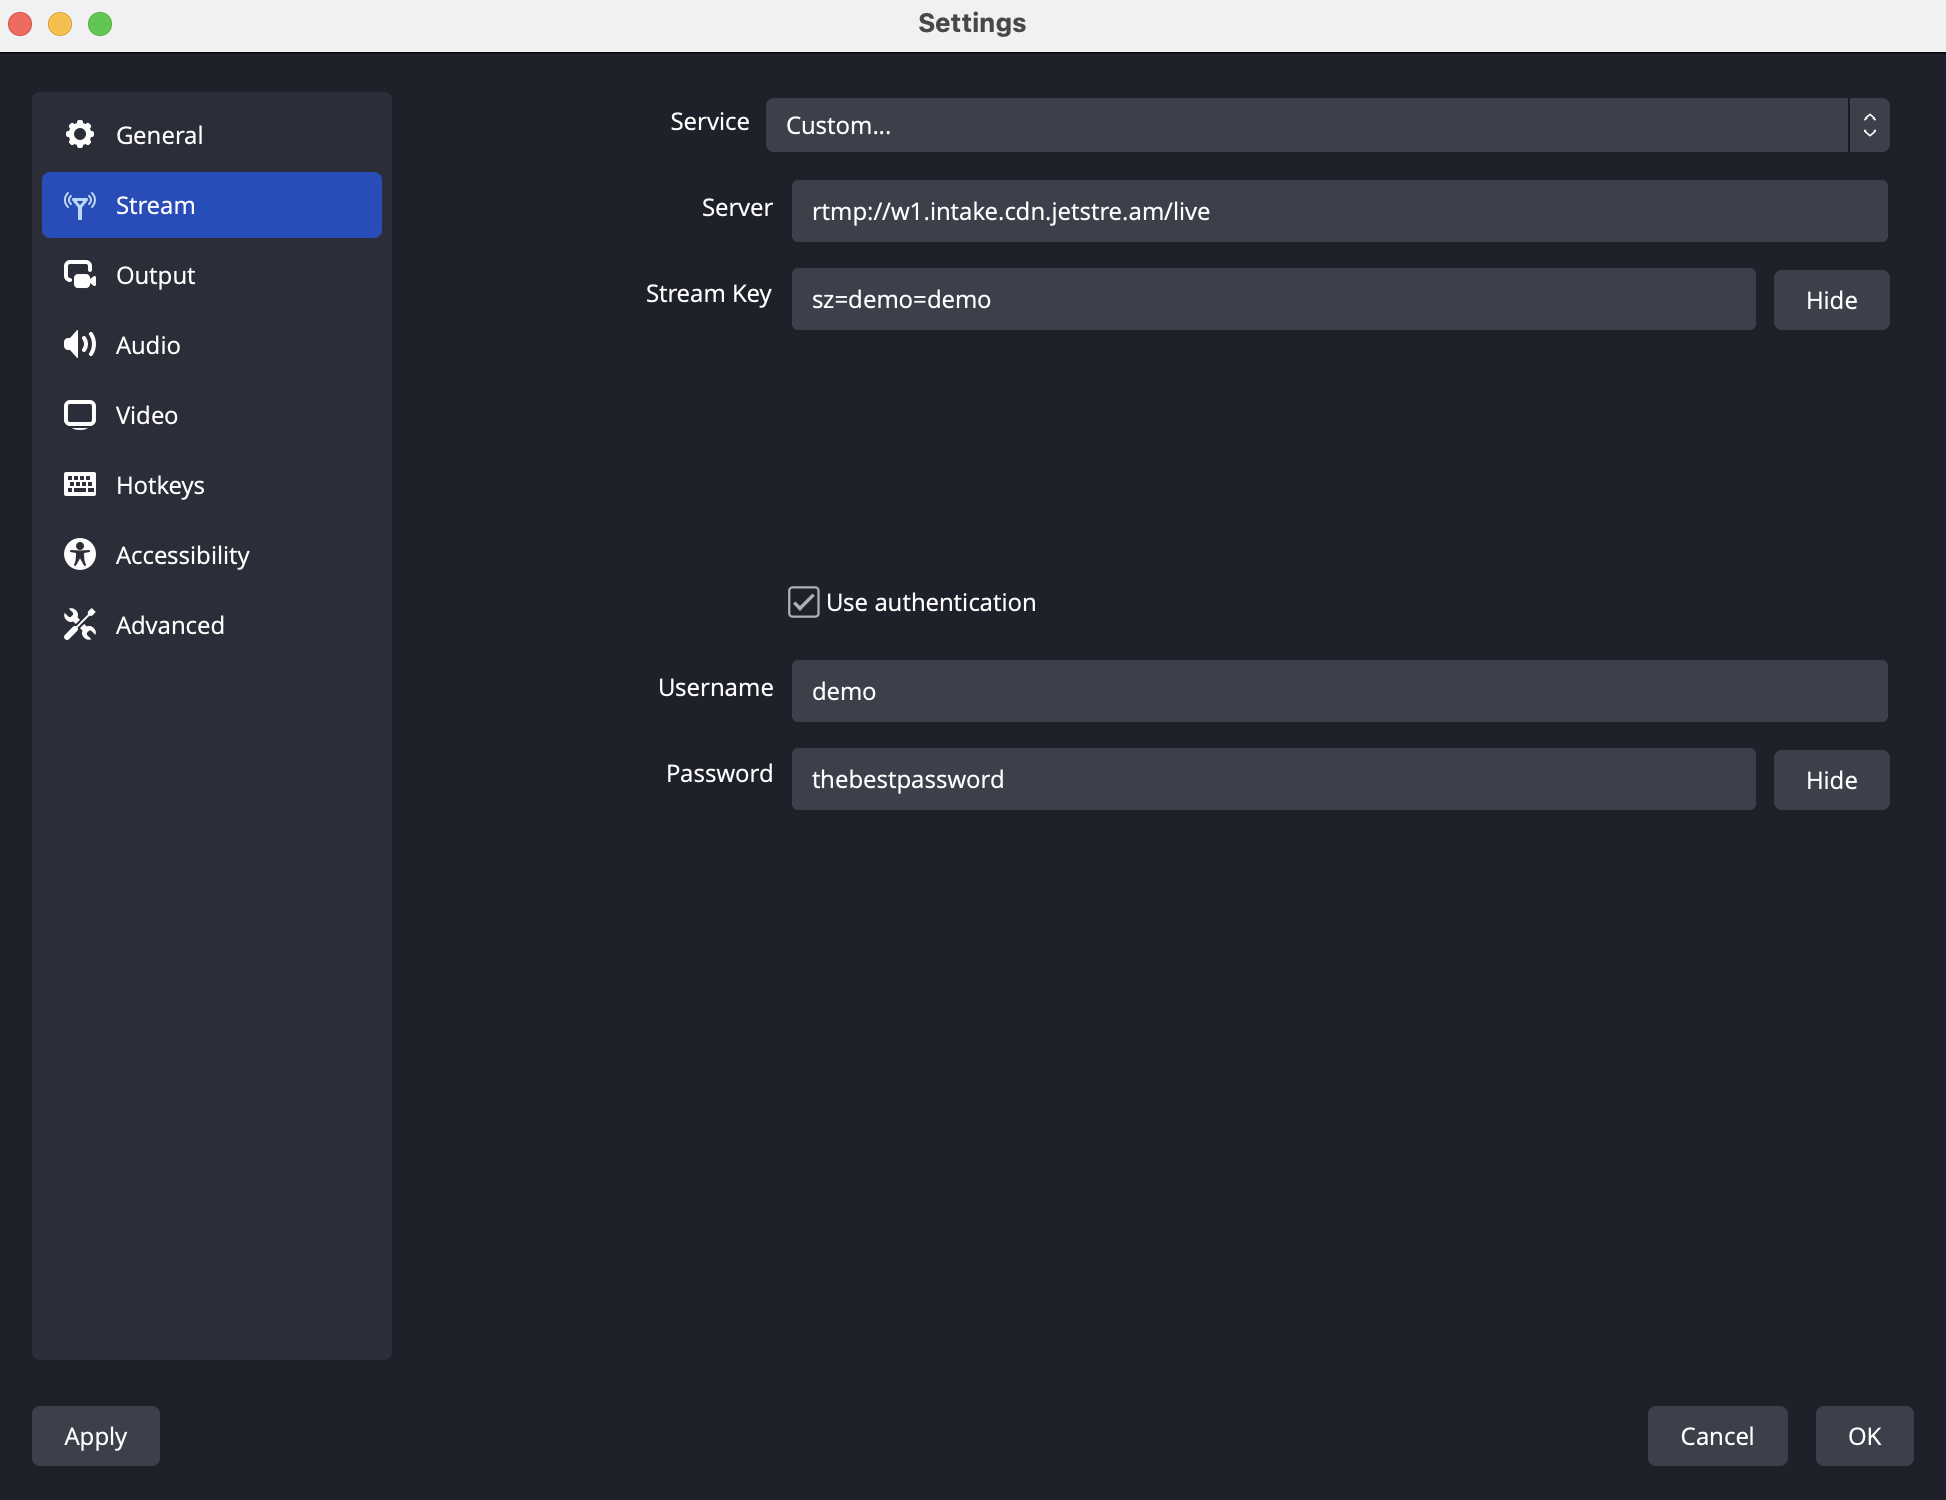
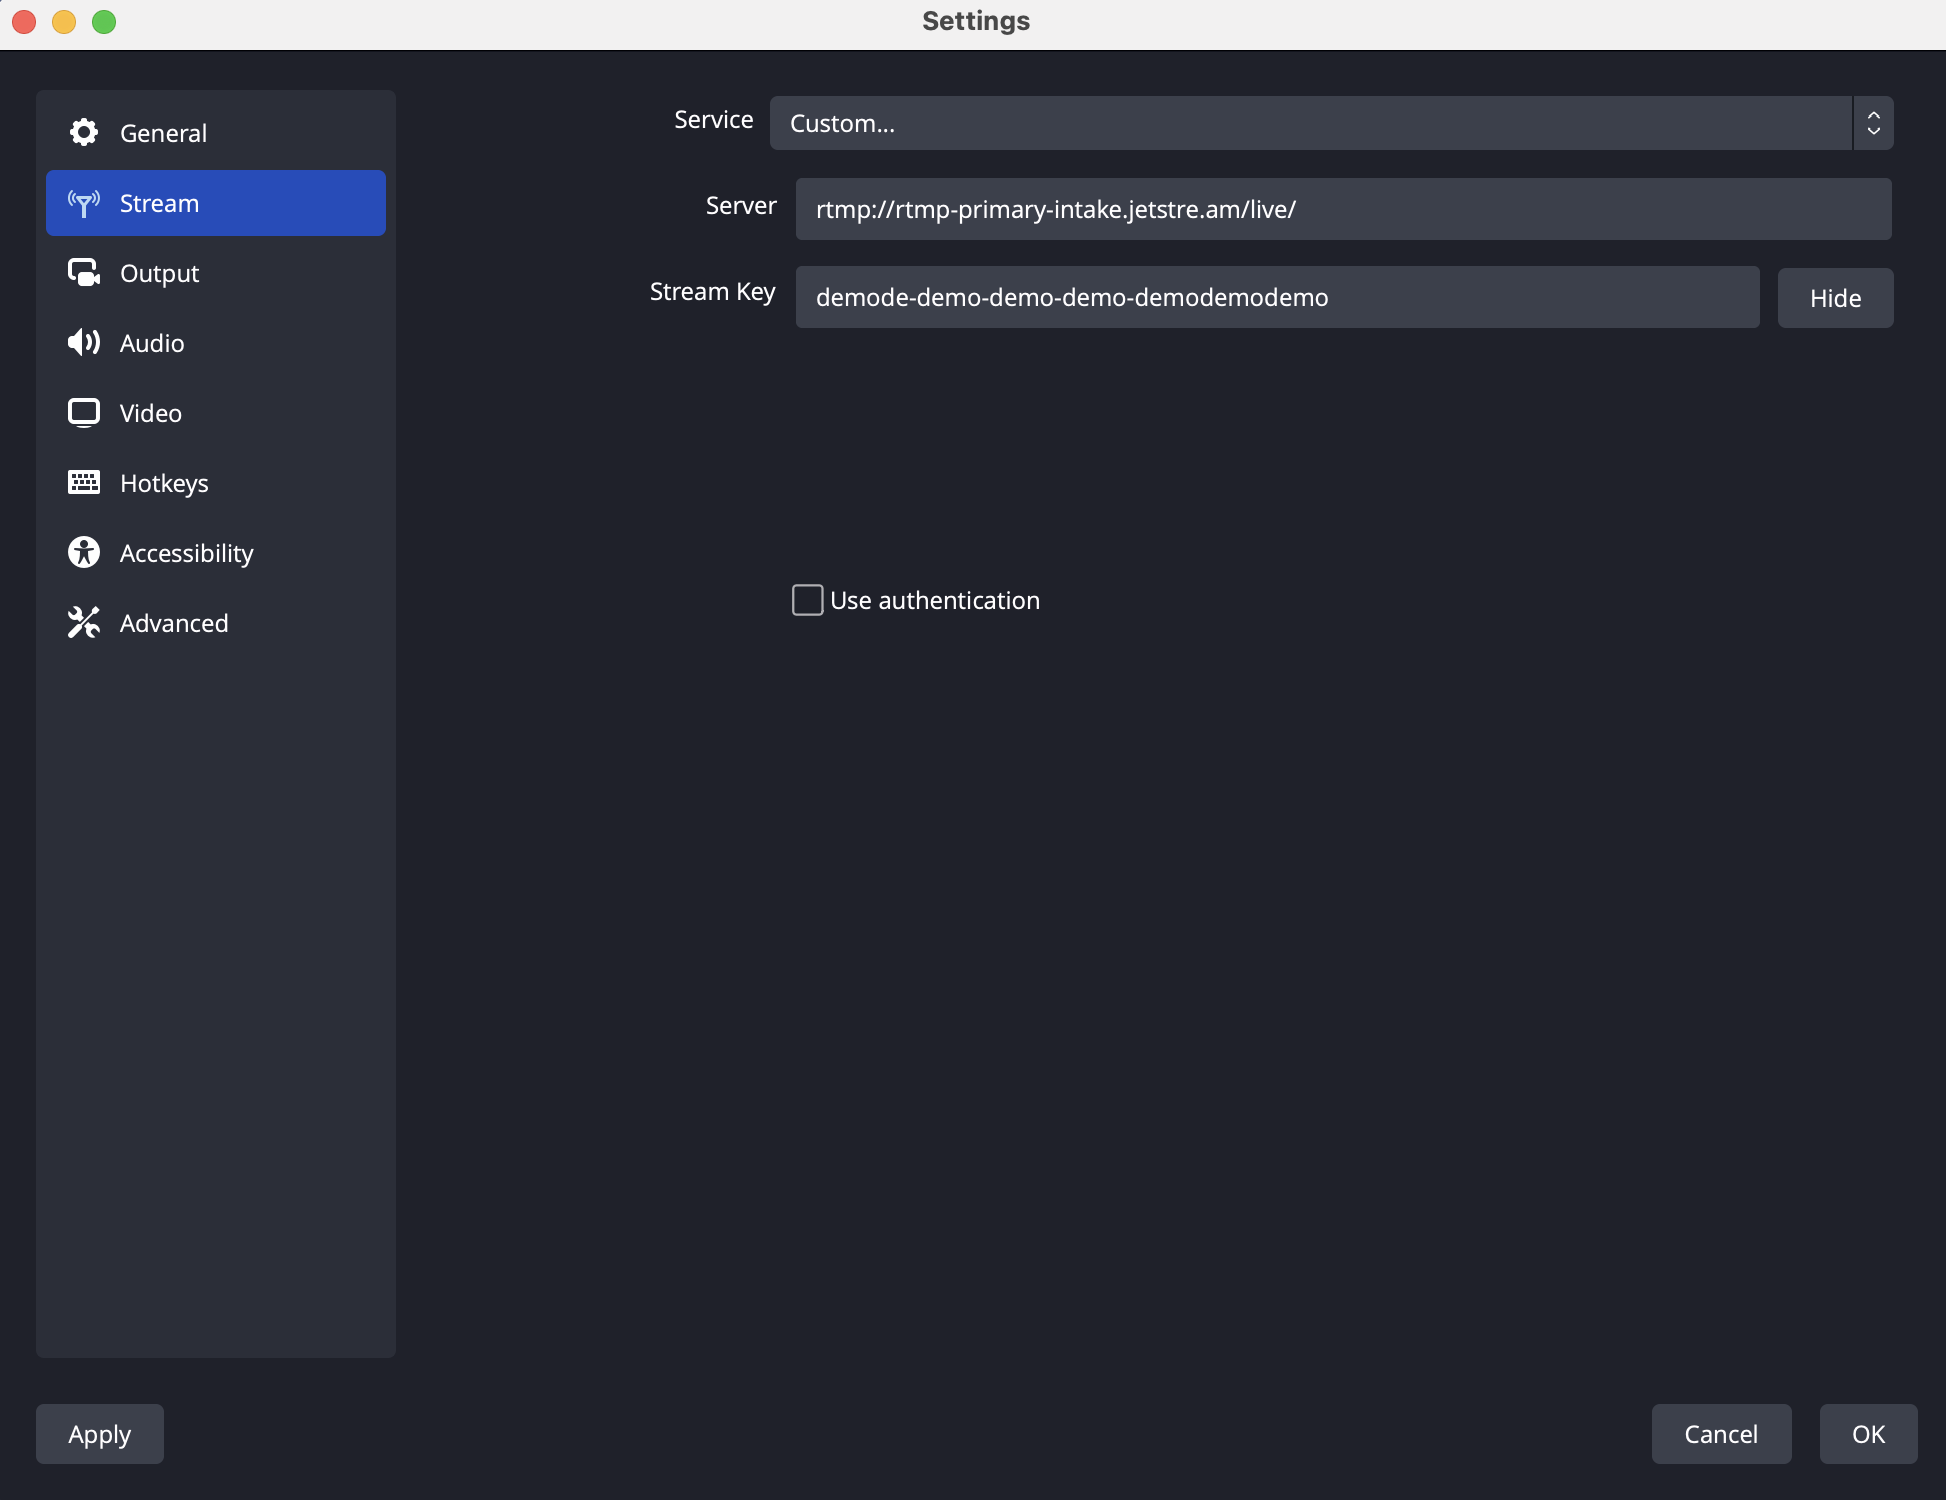
Configure your sources in OBS.Open OBS Settings and go to the Stream menu. Select “Custom...” Enter the provided server name, stream name, user name and password into OBS.
Click OK.
- Authentication
- Streamkey
Configure the encoding settings
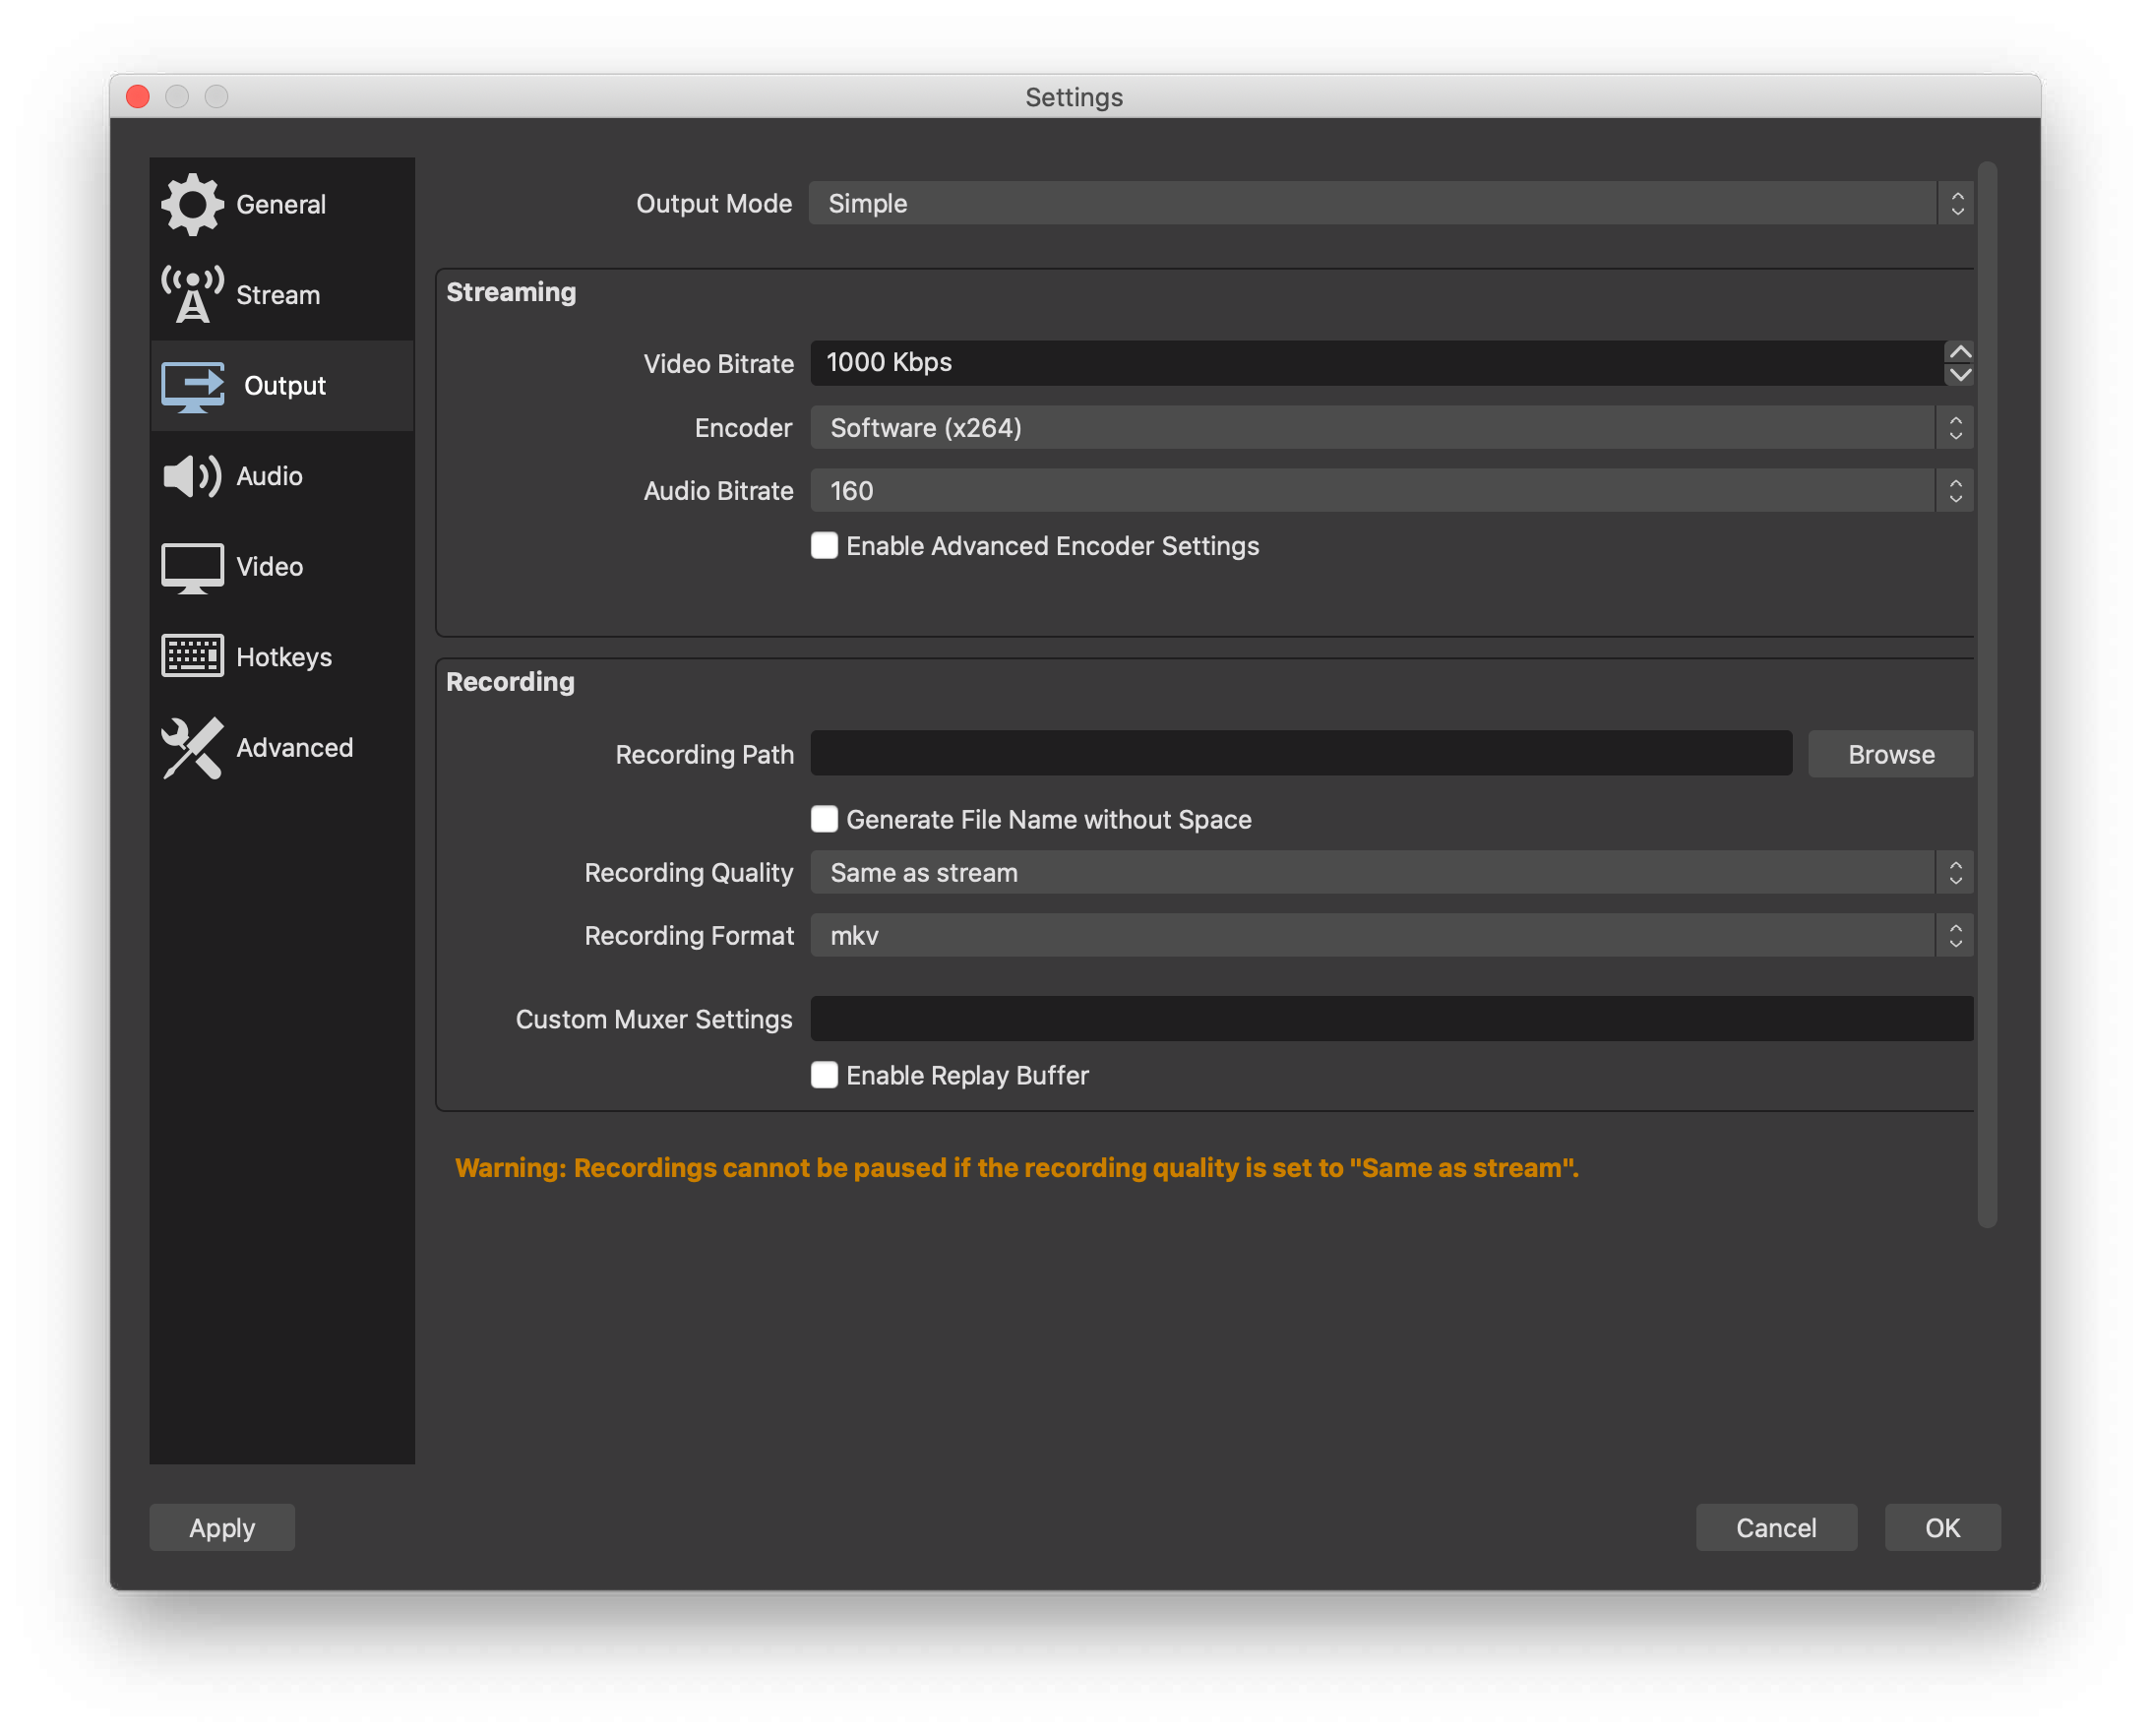
Open OBS Settings and go to the Output menu. Select Simple as Output Mode.Video bit rate: enter your desired bitrateEncoder Software (x264)Audio Bitrate: select your desired bitrate
Click OK to save.
Advanced (optional)
Advanced configuration
By default OBS does a proper job in producing a reliable stream that we can transmux into reliable HLS and DASH streams.
OBS allows you tune your encoding settings. For best stability and wide device compatibility we advise to use these encoder parameters. Note that some devices may not support advanced profiles.Video• H.264 codec• Profile: baseline 3.2 profile for SD and HD. High 4.1 for full HD.• Frame rate: 25 or 30• Keyframe: every 2 seconds (e.g. every 50 at 25fps, every 60 at 30fps)• Constant bit rate (CBR) encoding• Enable deinterlacing for interlaced content• Screen size / aspect ratio: even numbers are advised• Bit rate: depends on desired quality
Audio
- AAC / AAC-LC codec
- Stereo
- Sampling: 48KHz
- Bit rate: depends on desired quality
Bit rate guidelines
The bit rate depends on the size and on how dynamic your content is. Talking heads require much less bandwidth than active sports. Tuning and testing will give the best results:
- 4K: 6 to 25Mbps
- 1920x1080: 2 to 6Mbps
- 1280x720: 1 to 3Mbps
- SD: 768x432 at 500Kbps
- Audio: 160-256Kbps for stereo music
- Audio: 96-128Kbps for stereo voice
Go live
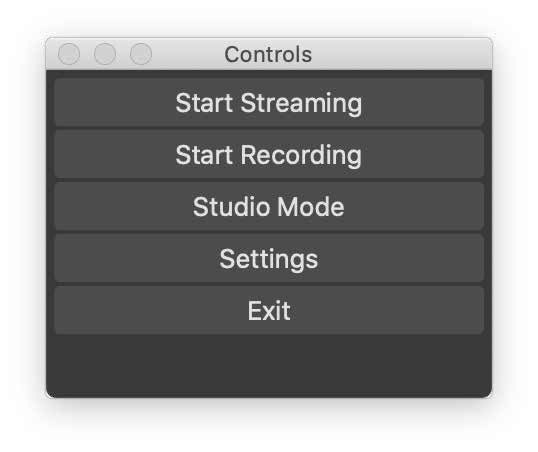
Start streaming
In OBS, click on Start Streaming
Wirecast
Wirecast is a encoder for mac and windows, wirecast had unlimited inputs, and a lot of other advanced functions. wirecast works with the jet-stream platform. wirecast documentation can be found here the same as with OBS wirecast can be configured with the settings shown in the table and the encoder settings shown in your account.
| field | Desciption |
|---|---|
| Container | MP4 (Only if applicable) |
| Videocodec | H264 |
| Keyframes | 2 seconds. When you are using 25 FPS you need to configure a keyframe every 50 frames |
| H264 profile | When the resolution is below 1280*720: Baseline 3.2 When the resolution is 1280*720 or higher: High 4.1 |
| Video bitrates | 424*240 512 kbit (Baseline 3.2) 640*360 1 mbit (Baseline 3.2) 1280*720 2,5 mbit (High 4.1) 1920*1080 5 mbit (High 4.1) |
| Audio codec | AAC-LC or AAC when AAC is not an option for you, you should use MP3 Samplerate: 48Khz |
How to setup Wirecast
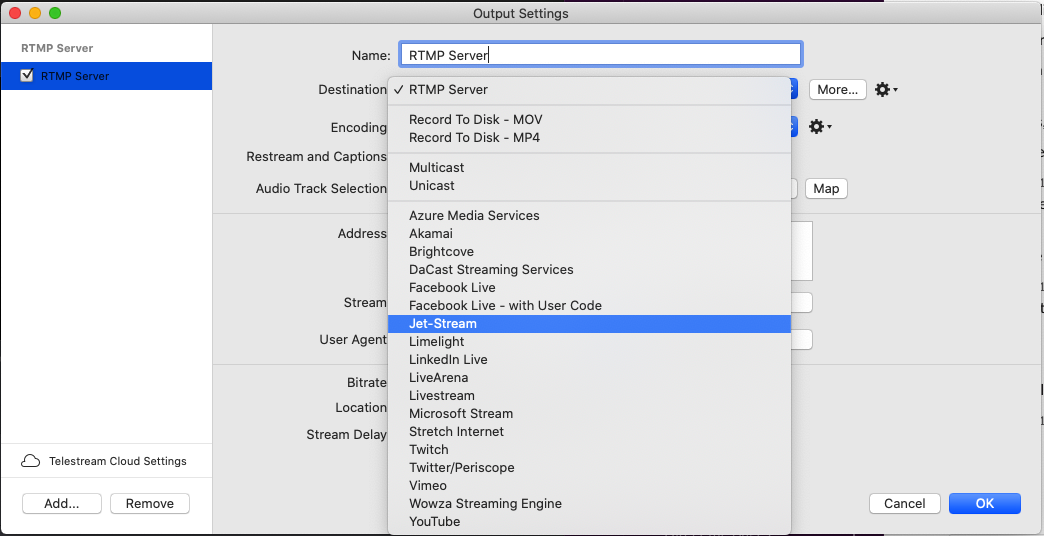
After installing or opening Wirecast please open the "output settings" window. you can do so by pressing CTRL + Y or COMMAND + Y, depending on your platform.
then select the desired stream format selected in Cockpit. (For example RTMP server)

At the destination option you can select Jet-Stream and it will automatically find the primary and secondary servers.
Sadly this method no longer works, You will have to manually add the servers that we found in the encoder settings menu of Cockpit.
Then select the desired encoding settings.
 After this enter your Jet-Stream login information and click "OK" and you are ready to go!
Here you can enter the stream URL and Stream name as shown in your Cockpit dashboard. vFor the encoder you can use one of the existing presets or make a new preset with the settings shown above. Now click on the "Set credentials" button and fill in your Cockpit username and password as shown in the encoder settings. Then click on "OK" and you are ready to start streaming.
You can download wirecast Here
Adobe Live Media Encoder
Now that we have created your LiveStream we need an encoder to send the video to our servers.. In this case we use the Adobe Flash Media Live Encoder. Which can be downloaded for free on http://offers.adobe.com/en/na/leap/landings/fmle3.html . After you installed the program you need to start The Flash Media Live Encoder.
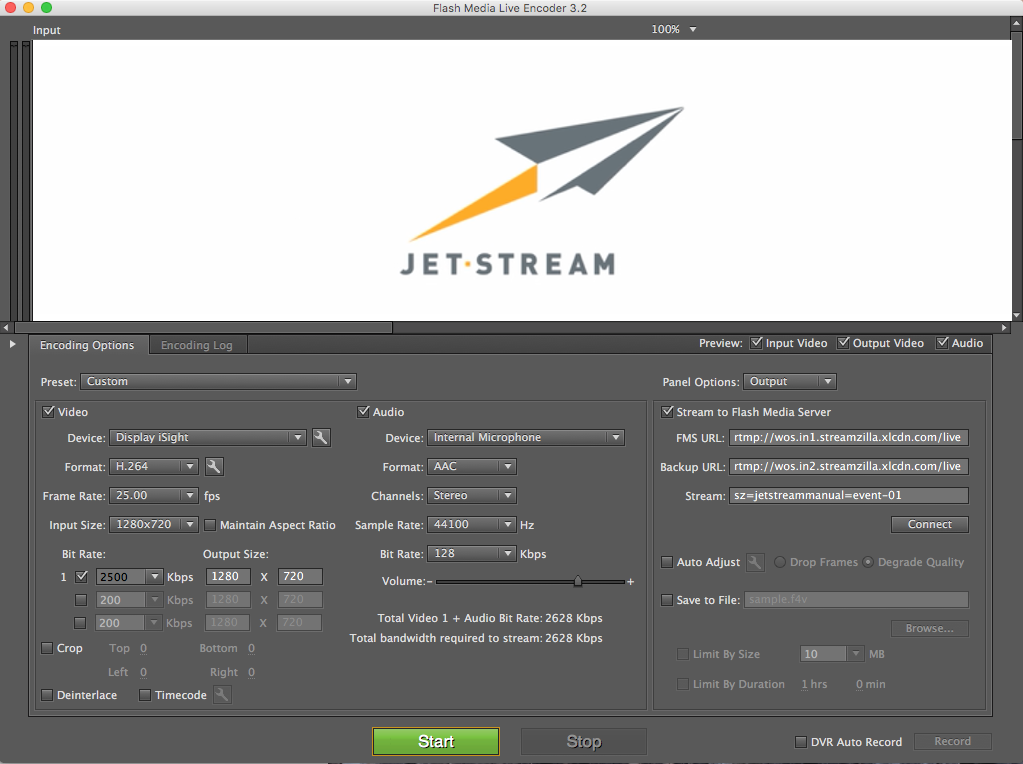
First you need to select your Video device. And choose H264 as the format. After that you click on the wrench next to the format. For best results choose Baseline 3.2 with keyframes every 2 seconds. If your content is hd or higher (1280*720) you need to High 4.1. See the table below for more information:
| field | Desciption |
|---|---|
| Container | MP4 (Only if applicable) |
| Videocodec | H264 |
| Keyframes | 2 seconds. When you are using 25 FPS you need to configure a keyframe every 50 frames |
| H264 profile | When the resolution is below 1280*720: Baseline 3.2 When the resolution is 1280*720 or higher: High 4.1 |
| Video bitrates | 424*240 512 kbit (Baseline 3.2) 640*360 1 mbit (Baseline 3.2) 1280*720 2,5 mbit (High 4.1) 1920*1080 5 mbit (High 4.1) |
| Audio codec | AAC-LC or AAC when AAC is not an option for you, you should use MP3 Samplerate: 48Khz |
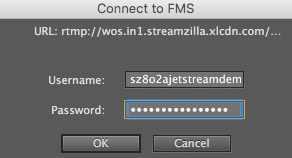
In the FMS URL you need to provide the Primary URL. In the Backup URL you need to specify the secondary Wowza URL. In the stream box you need to copy the Stream, please use the settings provided by Cockpit. Now you click on connect. The program will ask for the username and password 2 times. Please make sure that Save to File is unchecked.
Now you can click on the Start button and the stream will begin. When you exit the program all settings will be saved. You only need to specify the username and password again if you restart the program.