Transcoding
With transcoding you get the ability to upload a single file in a high bitrate and let it transcode based on the configured profile. This way you can create multi bitrate VoD content with a single upload with an easy workflow.
A started transcoding job cannot be canceled anymore. Costs of the job will be billed
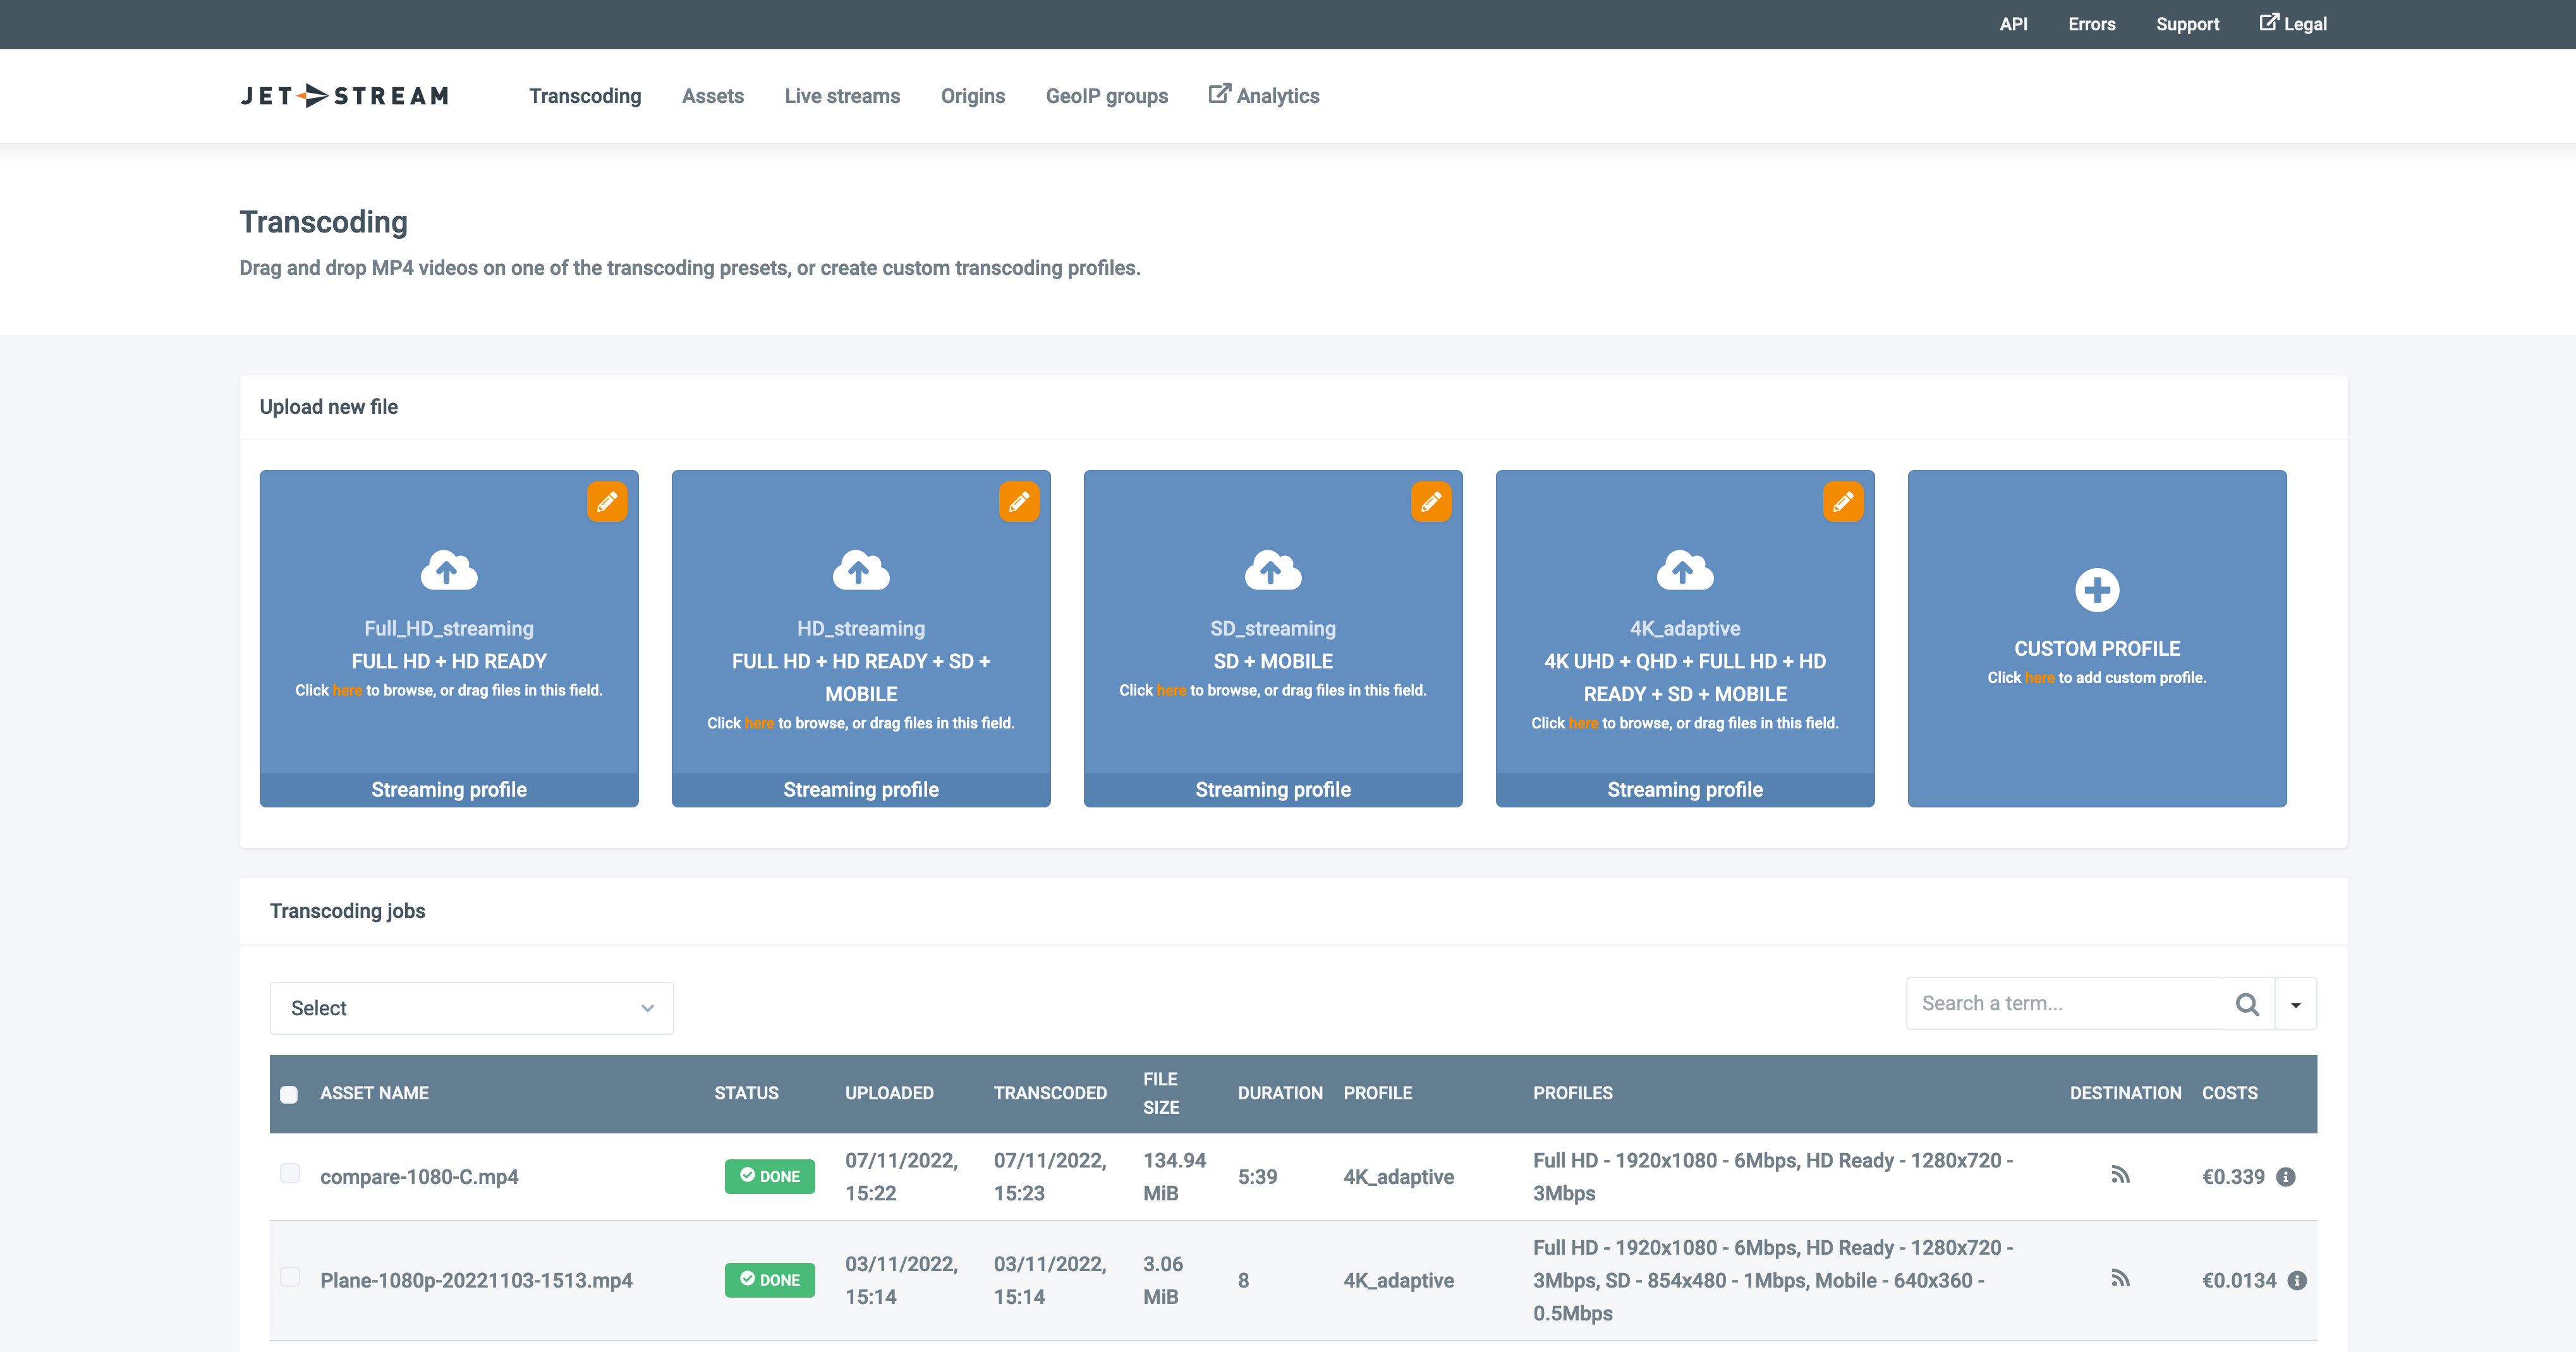
Transcoding jobs
When selecting transcoding an overview of active transcoding jobs is shown. Here you have the ability to cancel a queued transcoding job.
Profile
In order to use transcoding a profile has to be created. This can be done at the profile sub-menu. This will give a new list of all existing transcoding profiles in your account.
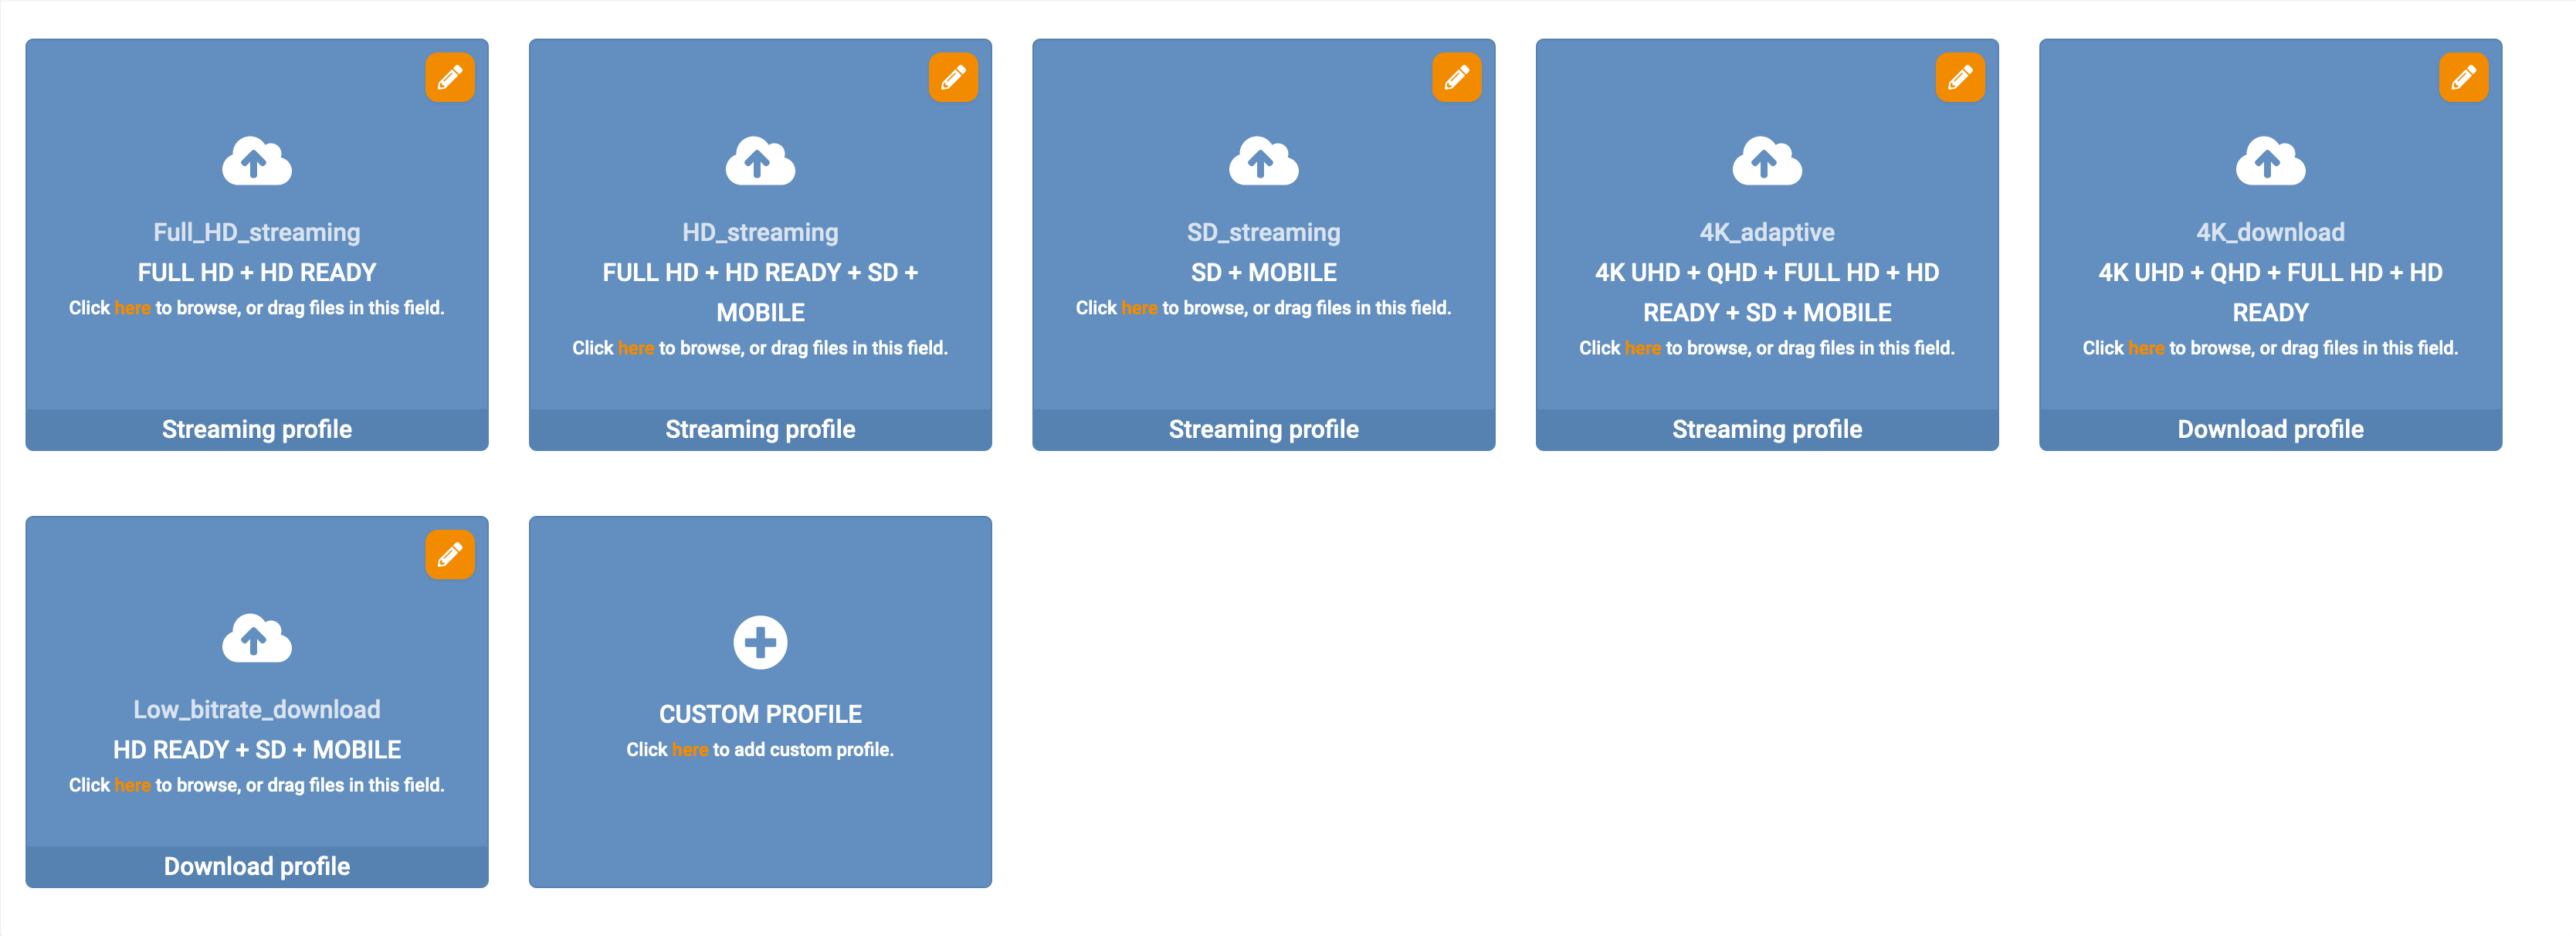
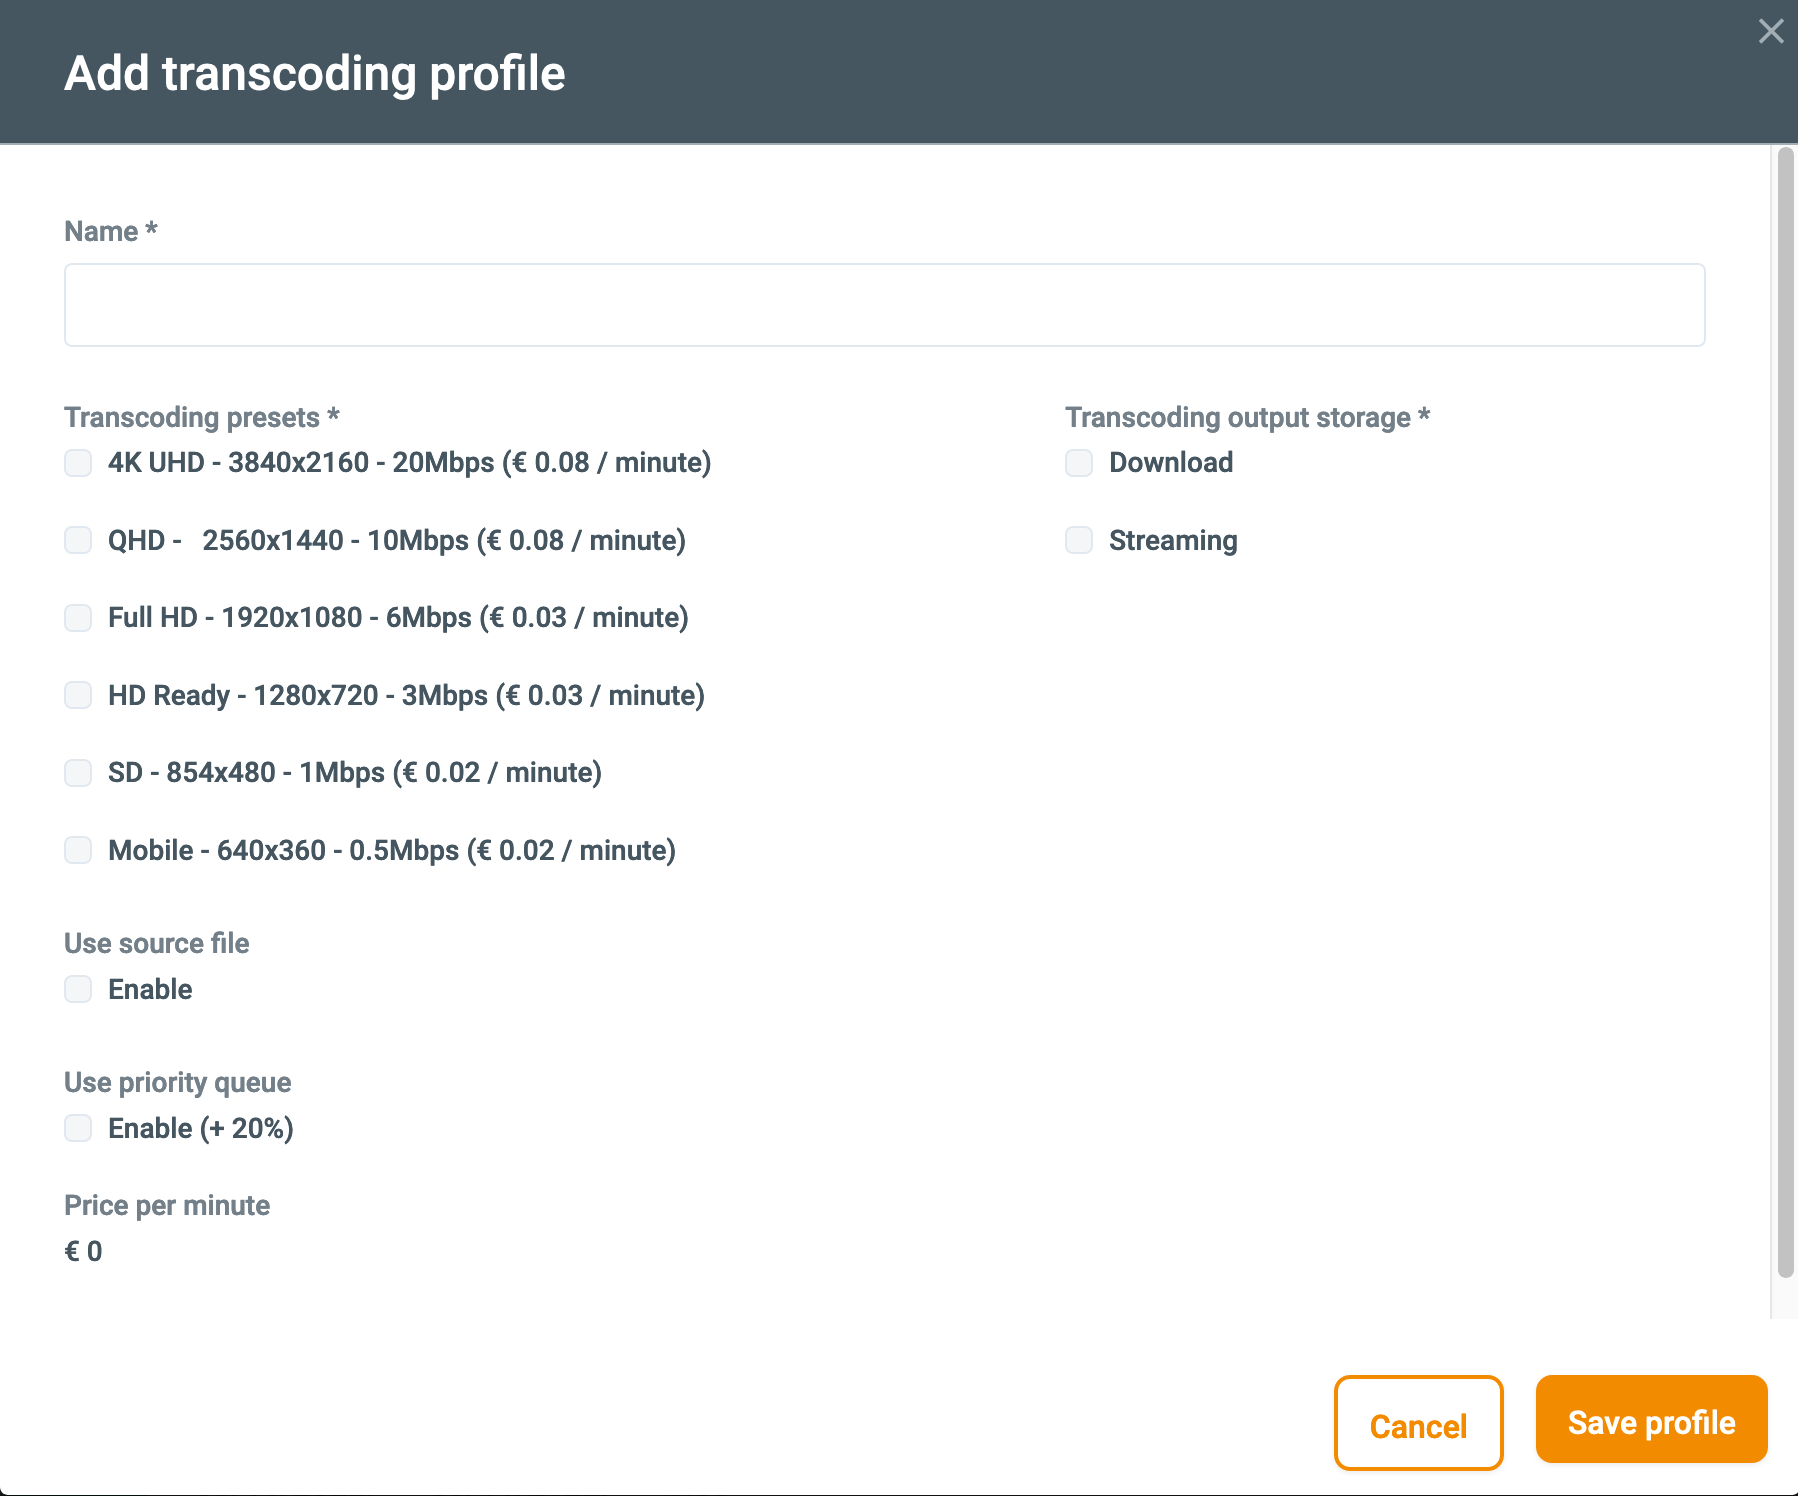
By clicking on the 'Custom profile' you can create a new transcoding profile. By clicking on the name in the profile list, you are able to change the existing transcoding profile.
| Field | Description |
|---|---|
| Transcoding profile name | This is the name of the transcoding profile. This name will then show up in the FTP dropbox in the /transcoding/ folder. Make sure you do NOT use spaces in the name. This can have undefined effects. |
| Transcoding presets | Here you select the different presets. Each preset has a different resolution or bitrate. Per preset the price per minute transcoding is shown. You can select any amount of presets. The minimum is at least one preset. |
| Transcoding output storage | Here you can select where the transcoded files will be placed. This can be download for progressive downloads. This can also be Streaming for streaming files. Or you can select both. Keep in mind selecting both, will increase your storage usage faster. |
| Use source file | This option will you use the original file in the output VoD. If the uploaded content is Full HD, it can be used as part of the transcoded output for playout. |
| Use priority queue | When selecting this, the transcoding job will use a faster but also more expensive transcoding queue. |
| Price per minute | Here you can see what the transcoding price would be per minute transcoding. This is the price of all the presets together and will update when changing the presets. |
Content
You can click on one of the transcoding profiles to upload your files, it is also posible too drag and drop the files on the desired profile. When the upload is done, the progressbar will fill 100% and will give a message that the file is uploaded. Go to the active queue to see the uploaded file for transcoding.
Transcoding recordings
In VDO-X it is possible to transcode a single (high) bitrate recording to a multi bitrate VoD asset. This document will describe the necessary steps. We expect that the recording is done in Full HD and that that is the maximum bitrate of the VoD that is created of the recording.
Transcoding setup
Make sure you have setup a transcoding profile according to the transcoding manual. Create a profile with the following options: Give the profile a easy to remember name like 'MultibitrateRecording' Select all the wanted presets to create a multi bitrate VoD. Leave the highest bitrate un-ticked. Select 'Use source file'. This will be the highest bitrate of the VoD. This will create a new transcoding profile that uses the recording source as highest bitrate and will give the option to start the playback even when the transcoding is still running. *
Recording setup
Next step is to schedule a recording. Or manual start a new recording. This can be done following the recording manual. Use the following settings in the recording window:
- Select an easy to remember name for the VoD
- Select your recording start and duration
- Use the following path as recording save path: ' /MultibitrateRecording '
- Select ' transcoding ' at 'Save recording as'
With this setup, the recording will be pushed to the FTP dropbox when ready at the location: /transcoding/MultibitrateRecording. And that will trigger the transcoding actions based on the transcoding profile 'MultibitrateRecording ' created above.
* The recording will be pushed to the transcoding folder, in which the transcoding daemon will pick it up and start the transcoding actions. In the same time a smil file with a single bitrate is created from the recorded asset. This smil file will be updated with the other bitrates when the transcoding is done. This will be done without any human interaction.